
The Transform Effects extension in Atomic Addons allows you to add dynamic transformations to Elementor elements, giving you greater control over how sections, containers, images, and widgets move and appear. You can create engaging visual effects by adjusting transformations such as rotation, scaling, translation, skewing, and flipping. With smooth animation controls and flexible settings, you can enhance your layouts with interactive and modern effects without writing custom code. This documentation will guide you through how to use and configure the Transform Effects extension in Atomic Addons.
Enable the Transform Effects Extension #
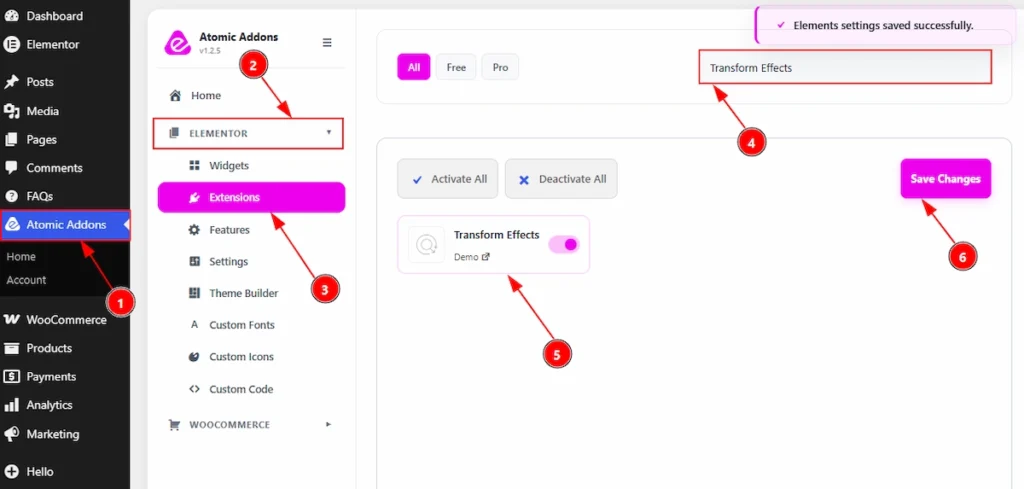
To use the Transform Effects Extension from Atomic Addons, first, you have to enable the extension.
- Go to WordPress dashboard → Atomic Addons Plugin dashboard.
- Then, click on the Elementor Tab and the sub items will open.
- Then, Click the Extensions Tab.
- Search for the Transform Effects Extension.
- Enable the Transform Effects Extension.
- Hit the Save Settings Button.
Place to Find the Transform Effects Extension #
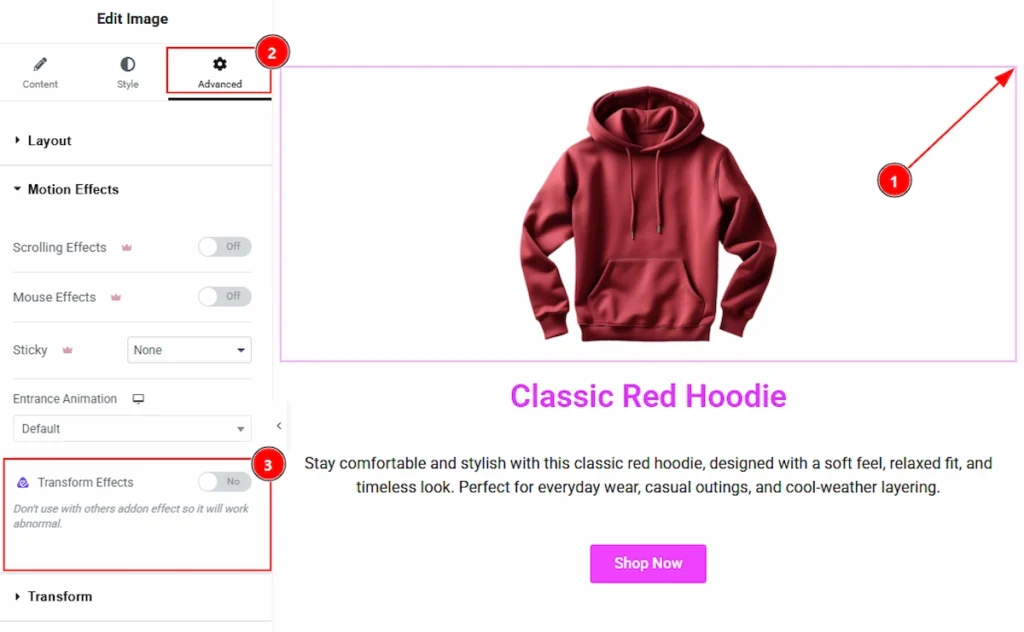
To find the Transform Effects Extension, you must need to select the element where you want to use the extension. Let’s see the steps below –
1. Click to any elements which you want to configure by the Transform Effects extension.
2. Now move to the Advanced tab.
3. Select the Motion Effects and click on it. Inside the Motion Effects Tab, you will found the Transform Effects extension visible.
Using the Transform Effects Extension #
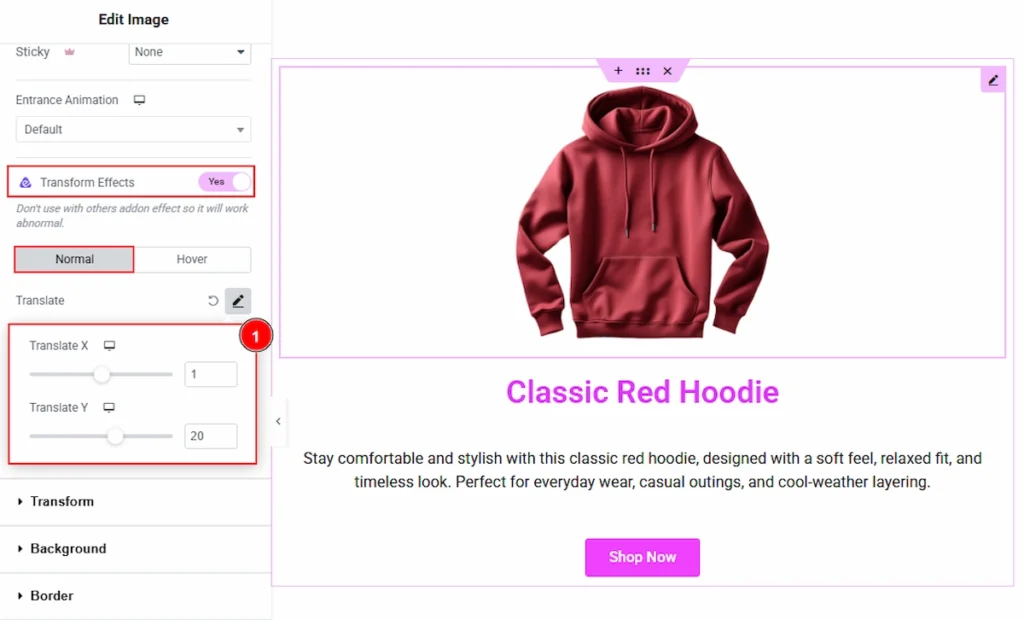
To configure the Transform effects, you will get two more tabs. These are Normal & Hover. Let’s start describing those one by one. Let’s start with the Normal Tab first –
1. Translate: You can move the element horizontally or vertically to adjust it’s position on the X and Y axis. Here we will get two field to customize –
- Translate X – You can move the element position horizontally (left or right) with this option.
- Translate Y – You can move the element position vertically (up & down) with this option.
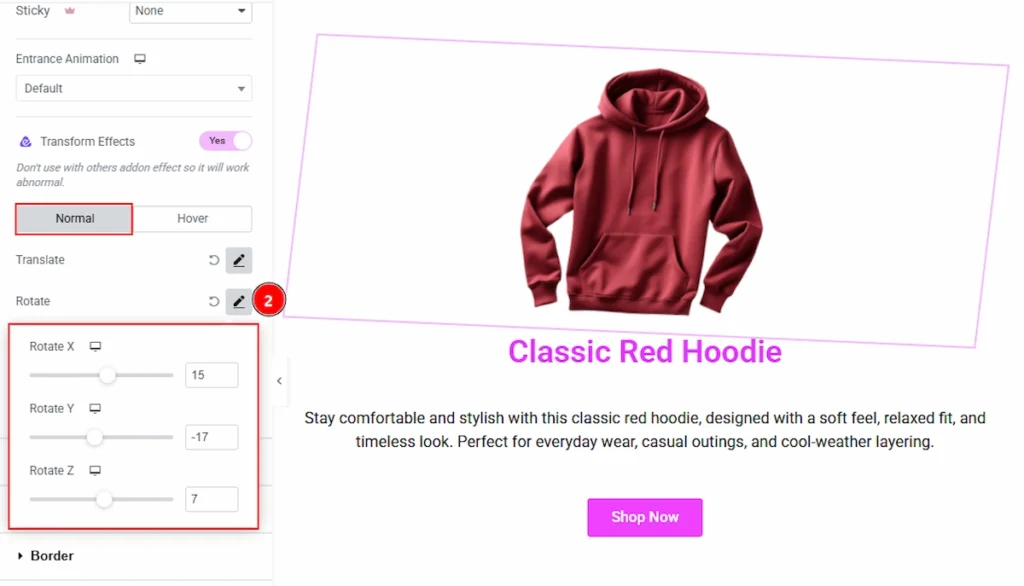
2. Rotate: You can rotate the element to a specified angle for dynamic visual orientation with this option.
- Rotate X – You can rotate the element along the horizontal (X) axis to create a 3D tilt effect.
- Rotate Y – You can rotate the element along the vertical (Y) axis for a side-to-side 3D rotation.
- Rotate Z – You can rotate the element around the front-facing (Z) axis, creating a standard spin effect.
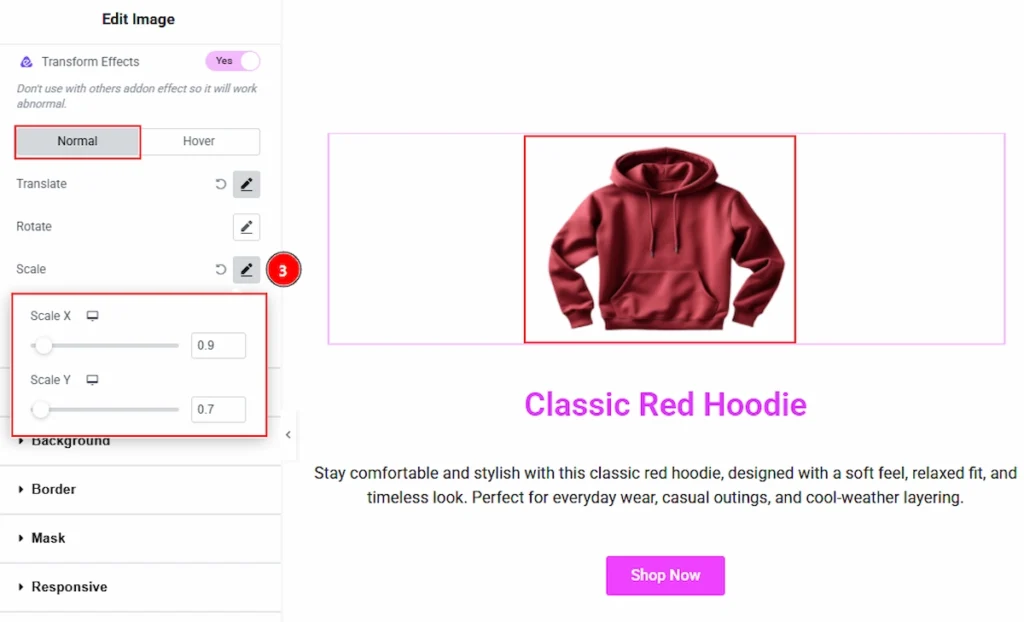
3. Scale: You can increase or decrease the size of the element while maintaining its proportions with this option.
- Scale X: This option allows you to stretches or compresses the element horizontally (left or right).
- Scale Y: This option allows you to stretches or compresses the element vertically (up or down).
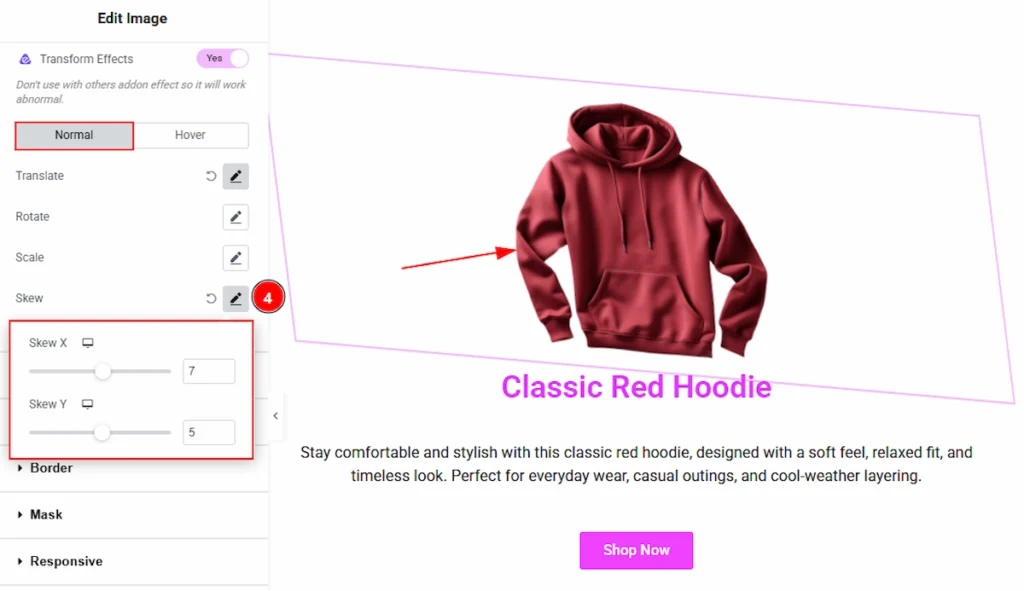
4. Skew: You can tilt the element along the X or Y axis to create a slanted or distorted effect.
- Skew X: This option allows you to slants the element horizontally (left or right), making top and bottom edges shift.
- Skew Y: This option allows you to slants the element vertically (up or down), making left and right edges shift.
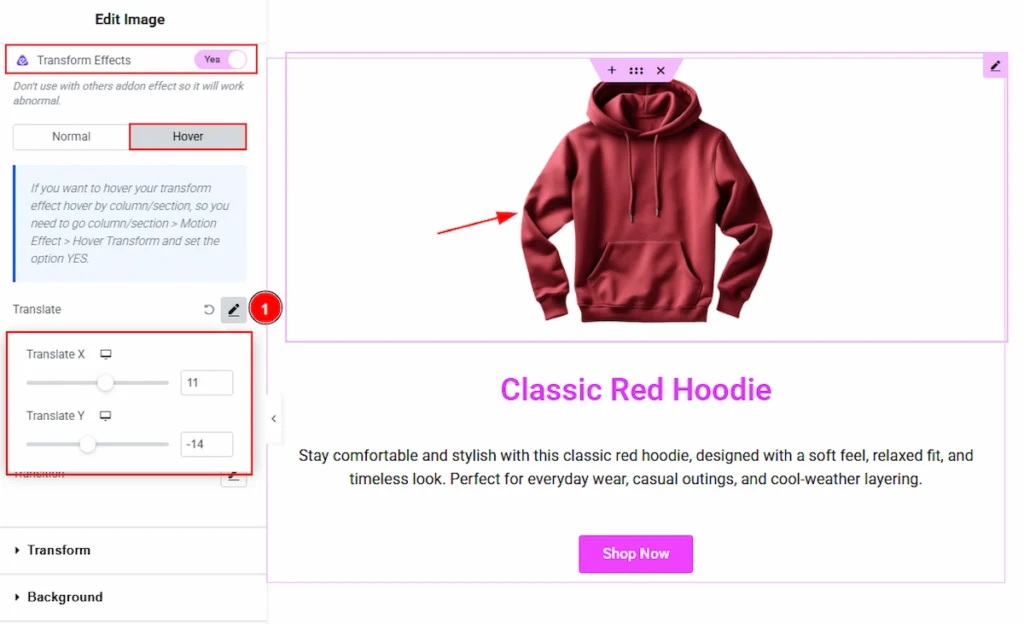
Now, let’s proceed to the Hover Tab –
1. Transform: You can adjust the movement of the element horizontally or vertically to adjust it’s position on the X and Y axis while hovering on it with this option.
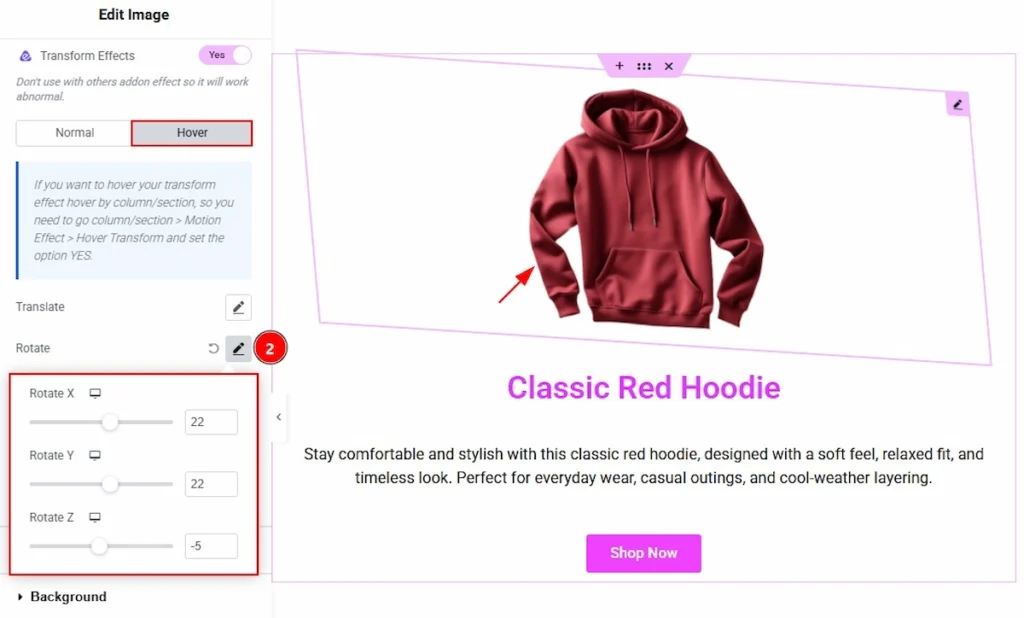
2. Rotate: You can rotate the element to a specified angle for dynamic visual orientation while hovering on it with this option. You can adjust the rotate X tilts horizontally, Y spins side‑to‑side, Z rotates normally from the front while hovering on it.
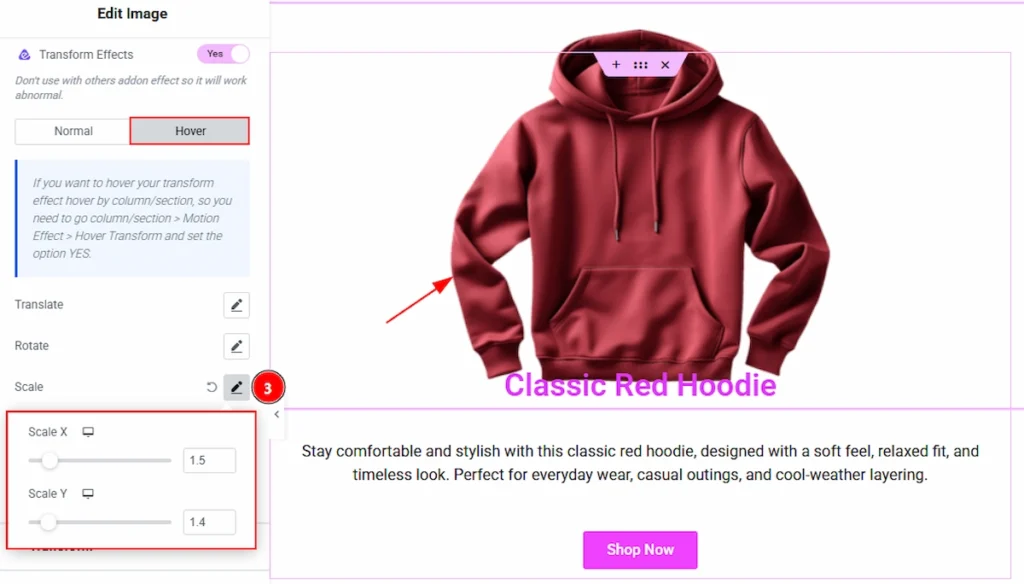
3. Scale: You can customize the scale here so on hover, Scale enlarges or shrinks the element proportionally, Scale X adjusts width, and Scale Y adjusts height for a dynamic effect.
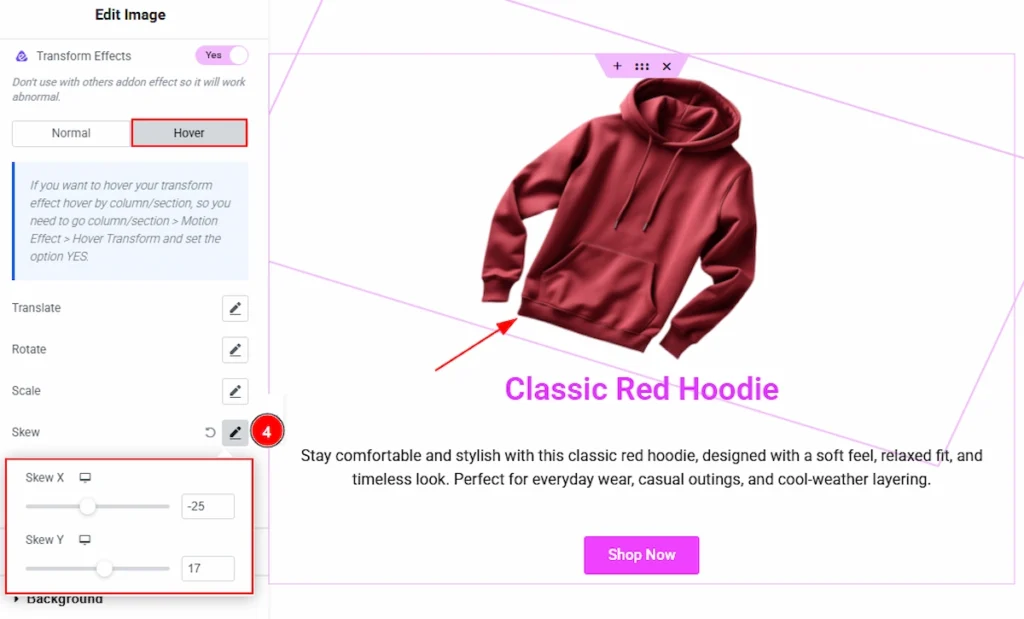
4. Skew: You can customize the scale here so on hover, Skew adds a tilt effect, Skew X slants horizontally, and Skew Y slants vertically for an interactive look.
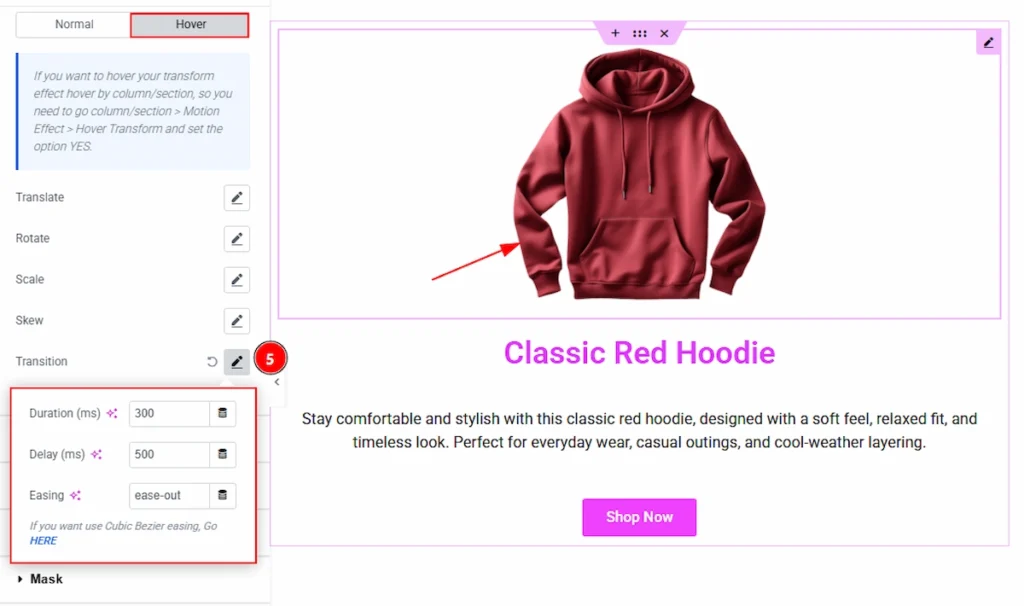
5. Transition: This option controls how smoothly the transform effect changes from its normal state to the animated state. Here you can adjust the below settings –
- Duration (ms): This option defines how long the transform animation will take to complete. Higher values create slower and smoother animations, while lower values make the effect faster.
- Delay (ms): You can add a waiting time before the animation starts after the hover or interaction is triggered.
- Easing: This option controls the speed curve of the animation, determining how the motion starts and ends. For example,
ease-outcreates a smooth ending effect by slowing down the animation toward the end.
All done, You have successfully customized the Transform Effects Extension on your website element.
Video Tutorial #
You can also watch the video tutorial to learn more about the Transform Effects extension.
Thanks for being with us.