
The Liquid Glass Effects extension in Atomic Addons allows you to apply modern glassmorphism-inspired styles to your Elementor elements. It helps create a sleek and elegant appearance by adding glass-like transparency, blur, and visual depth to sections, containers, widgets, and other content areas. With flexible styling options and easy-to-use controls, you can create attractive and modern interfaces that enhance the overall look of your website without writing custom code. This documentation will guide you through how to use and configure the Liquid Glass Effects extension in Atomic Addons.
Enabling the Liquid Glass Effects Extension #
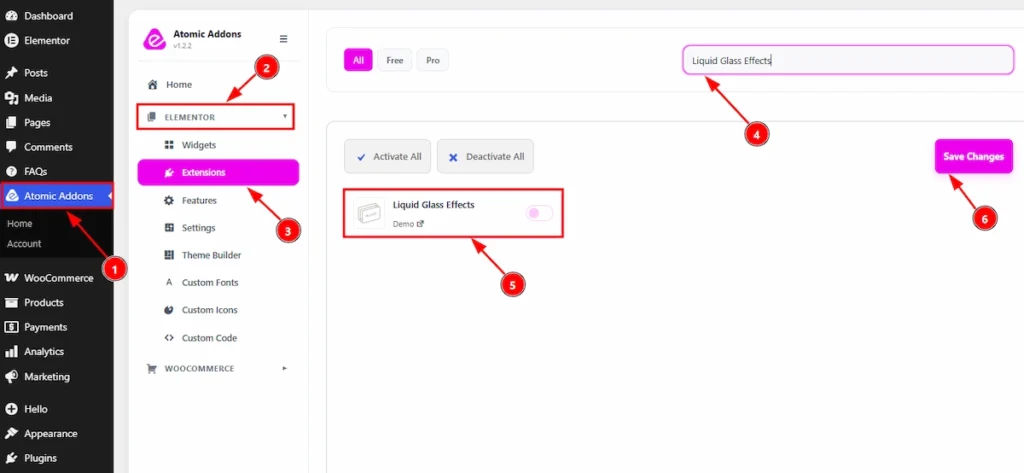
To use the Liquid Glass Effects Extension from Atomic Addons, first, you have to enable the extension.
- Go to WordPress dashboard → Atomic Addons Plugin dashboard.
- Then, click on the Elementor Tab and the sub items will open.
- Then, Click the Extensions Tab.
- Search for the Liquid Glass Effects Extension.
- Enable the Liquid Glass Effects Extension.
- Hit the Save Settings Button.
Primary Setup for Liquid Glass Effects Extension #
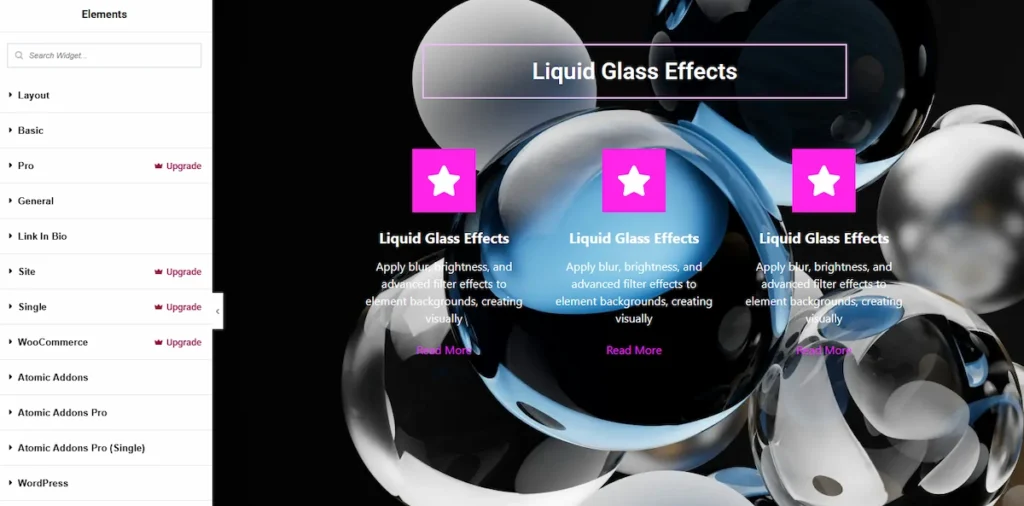
Before using the Liquid Glass Effects extension, you first need to create or select an existing design where you want to apply the effect. This will help you better visualize and customize the glass-style appearance within your layout.
Place to Find the Liquid Glass Effects Extension #
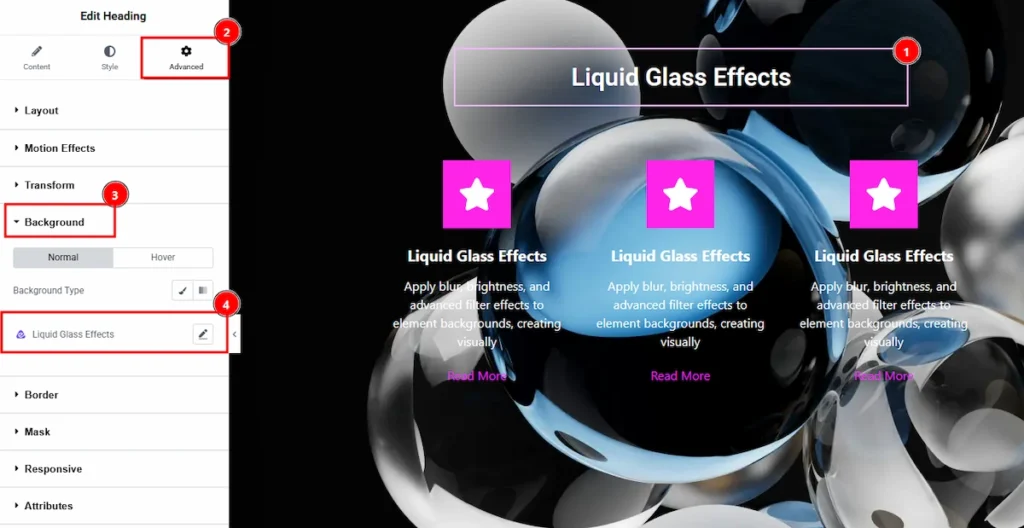
To find the Liquid Glass Effects Extension, you must need to select the element where you want to use the extension. Let’s see the steps below –
1. Click on the element which you want to configure by the Liquid Glass Effects extension.
2. Now move to the Advanced tab.
3. Click on the Background Tab.
4. You will find the Liquid Glass Effects extension here along with the Atomic Addons logo.
Using the Liquid Glass Effects Extension #
As the design is already created now we can select the elements where we want to use the Liquid Glass Effects Extension. To show you, we will apply the Liquid Glass effects Extension on Heading element & Advanced Icon Box element. Let’s start exploring those one by one.
Using the Liquid Glass Effects on Heading Element #
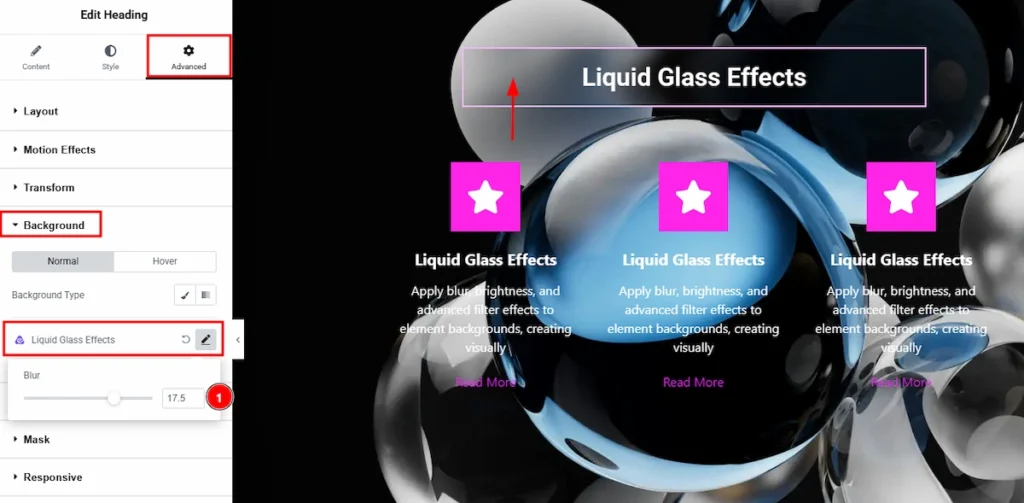
Select the Heading element and then go to Advanced Tab of the element and click on the Background Tab. Here you will see the Liquid Glass Effects Extension tab. Click on it and adjust the blur level that meet your needs.
Using the Liquid Glass Effects on Advanced Icon Box Element #
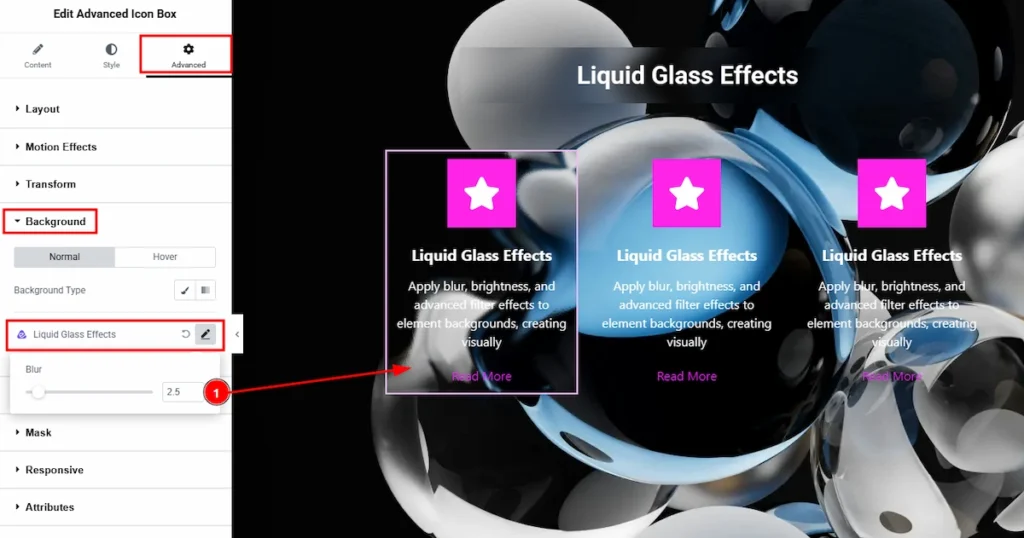
Select the Advanced Icon Box element and then go to Advanced Tab of the element and click on the Background Tab. Here you will see the Liquid Glass Effects Extension tab. Click on it and adjust the blur level that meet your needs.
Final Preview of The Liquid Glass Effects Extension #
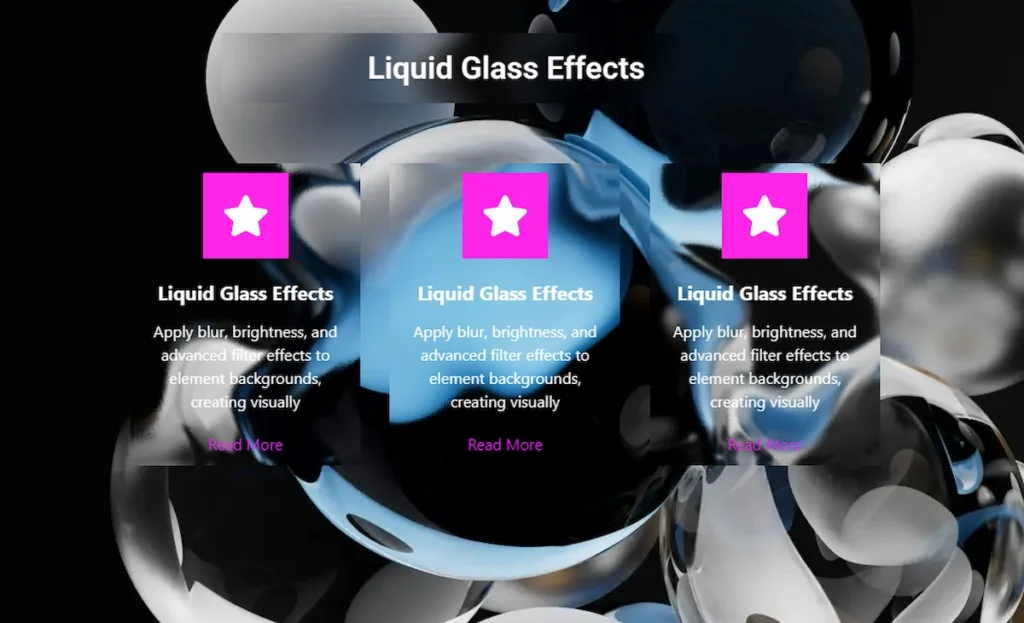
After adjusting the effects to your design, publish the page and you can see the output on the preview page.
All done, You have successfully customised the Liquid Glass Effects Extension on your website.
Video Tutorial #
You can also watch the video tutorial to learn more about the Liquid Glass Effects Effects extension.
Thanks for being with us.