
The Sticky extension in Atomic Addons lets you keep selected sections, containers, or widgets visible as visitors scroll through your page. It is useful for keeping navigation menus, important information, buttons, or other key elements within easy reach. With adjustable sticky positioning and responsive controls, you can create smooth scrolling experiences and maintain better access to important content across different devices. This documentation will guide you through how to use and configure the Sticky extension in Atomic Addons.
Enabling the Sticky Extension #
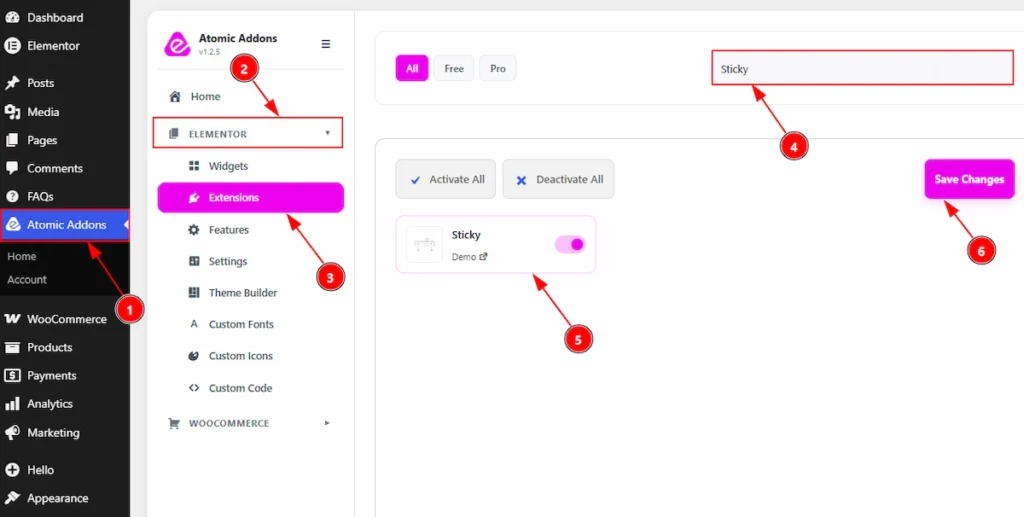
To use the Sticky Extension from Atomic Addons, first, you have to enable the extension.
- Go to WordPress dashboard → Atomic Addons Plugin dashboard.
- Then, click on the Elementor Tab and the sub items will open.
- Then, Click the Extensions Tab.
- Search for the Sticky Extension.
- Enable the Sticky Extension.
- Hit the Save Settings Button.
Place to Find the Sticky Extension #
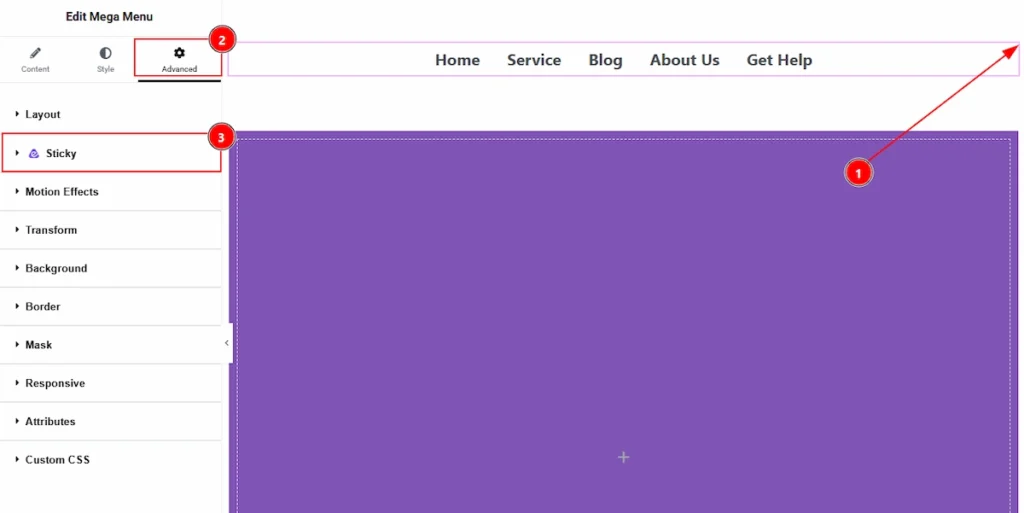
To find the Sticky Extension, you must need to select the element where you want to use the extension. As we are using it on Mega Menu, so we have selected the mega menu widget. let’s see the steps –
1. Click on the Element where you want to apply the sticky extension.
2. Now, move to the Advanced Tab.
3. You will find the Sticky extension here along with the Atomic Addons logo.
Using the Sticky Extension #
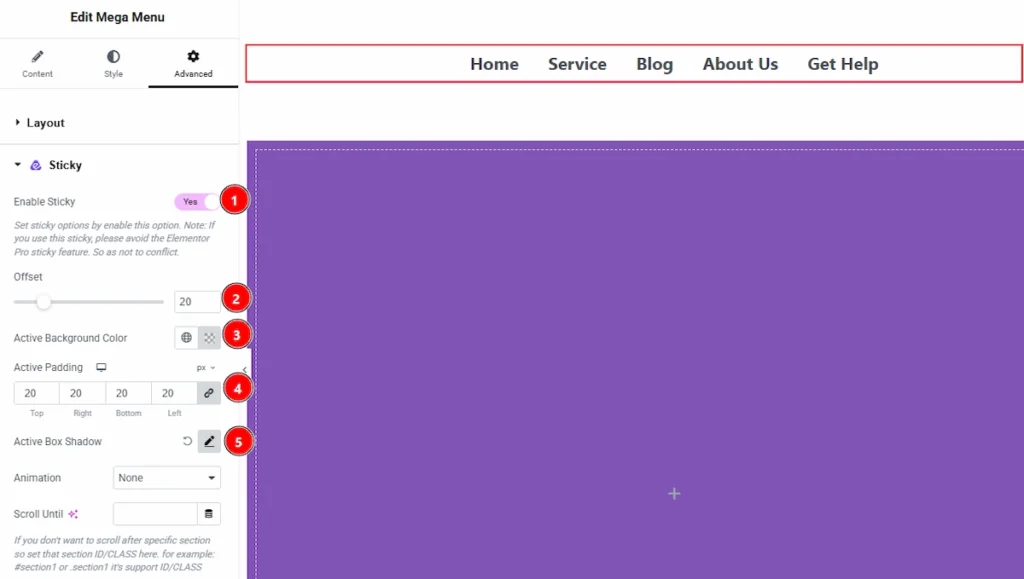
1. Enable Sticky: Enable the switcher to set the sticky options. Please note that if you use this sticky feature then you need to avoid using the Elementor Pro sticky feature so no conflict issue happen.
2. Offset: You can adjust the offset for the sticky element with this option.
3. Active Background Color: You can make changes to the sticky element background active color with this option.
4. Active Padding: You can adjust the inner space of the sticky element with this option.
5. Active Box Shadow: You can add a shadow effect to the sticky element when it’s active with this option.
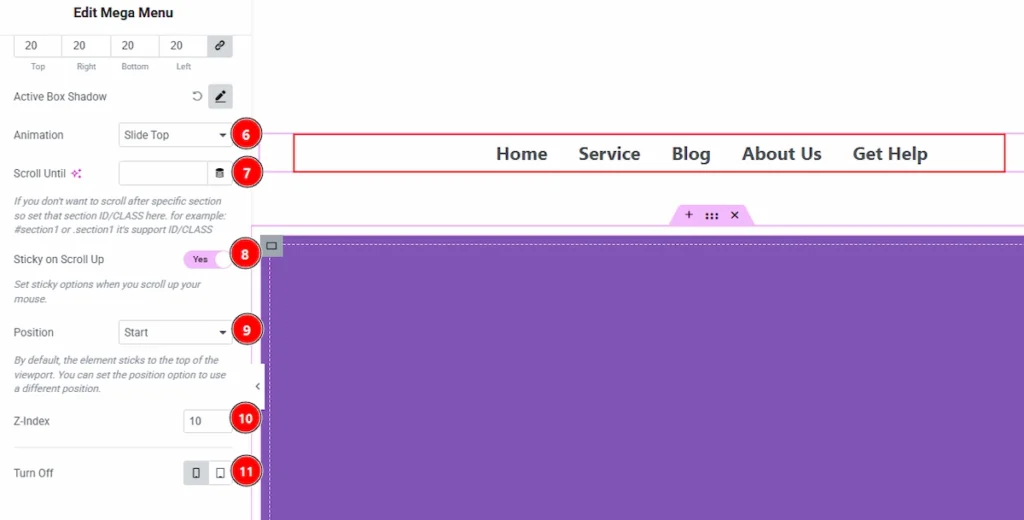
6. Animation: You can set the animation style of the sticky element appearance with this option.
7. Scroll Until: You can set the position for the sticky element in where you want to stop it to being sticky with this option.
8. Sticky on Scroll Up: Enable the switcher to make the element sticky when it will scroll up by mouse wheel.
9. Position: You can make the element sticky to the top of the viewpoint with this option. You can set the position option to use a different position.
10. Z-Index: You can set a value of the Z-Index to appear the sticky element on top of every other elements.
11. Turn Off: You can select the device where you want to turn off the sticky effect.
Preview: #
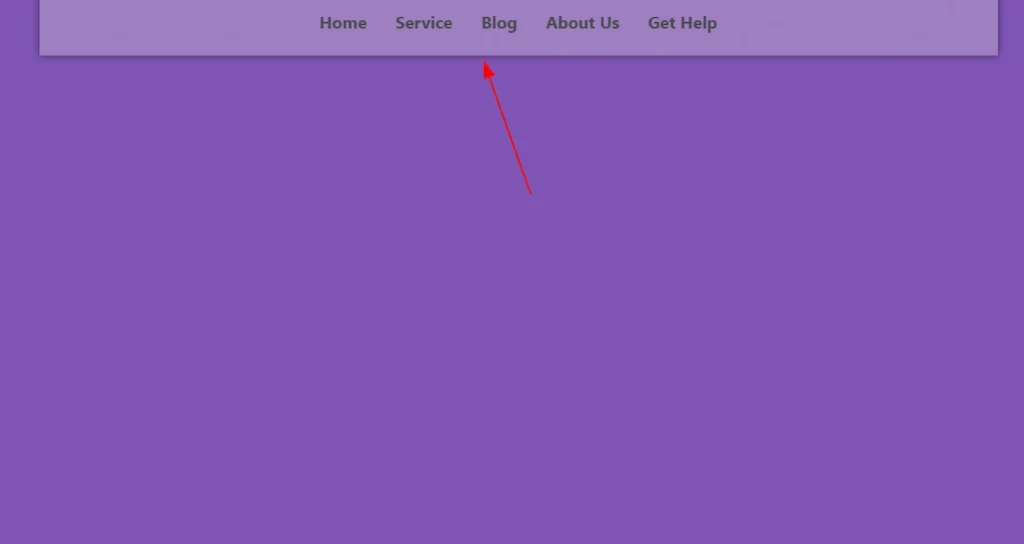
Please take a note that you won’t get a visual of the sticky extension when it’s on editor. You need to publish it and see the output in preview. Here, we have showed you the example where you can see all the changes that you have made.
Video Tutorial #
You can also watch the video tutorial to learn more about the Sticky Extension.
Thanks for being with us.