
The Floating Effects extension in Atomic Addons allows you to add smooth floating animations and subtle motion effects to your Elementor elements. It helps bring sections, images, icons, and widgets to life by creating gentle movement that makes your website feel more dynamic and engaging. With customizable animation settings and flexible controls, you can easily create attractive floating effects that enhance the overall visual experience without writing code. This documentation will guide you through how to use and configure the Floating Effects extension in Atomic Addons.
Enabling the Floating Effects Extension #
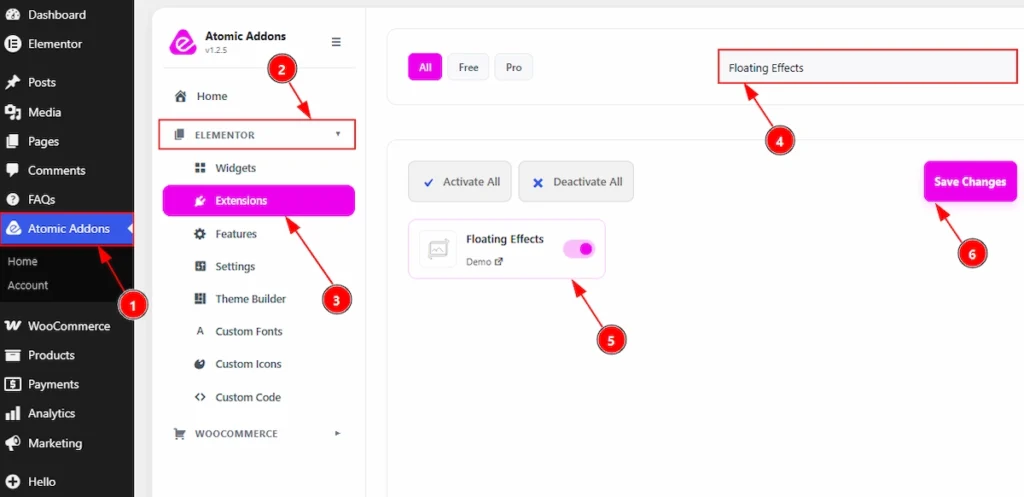
To use the Floating Effects Extension from Atomic Addons, first, you have to enable the extension.
- Go to WordPress dashboard → Atomic Addons Plugin dashboard.
- Then, click on the Elementor Tab and the sub items will open.
- Then, Click the Extensions Tab.
- Search for the Floating Effects Extension.
- Enable the Floating Effects Extension.
- Hit the Save Settings Button.
Place to Find the Floating Effects Extension #
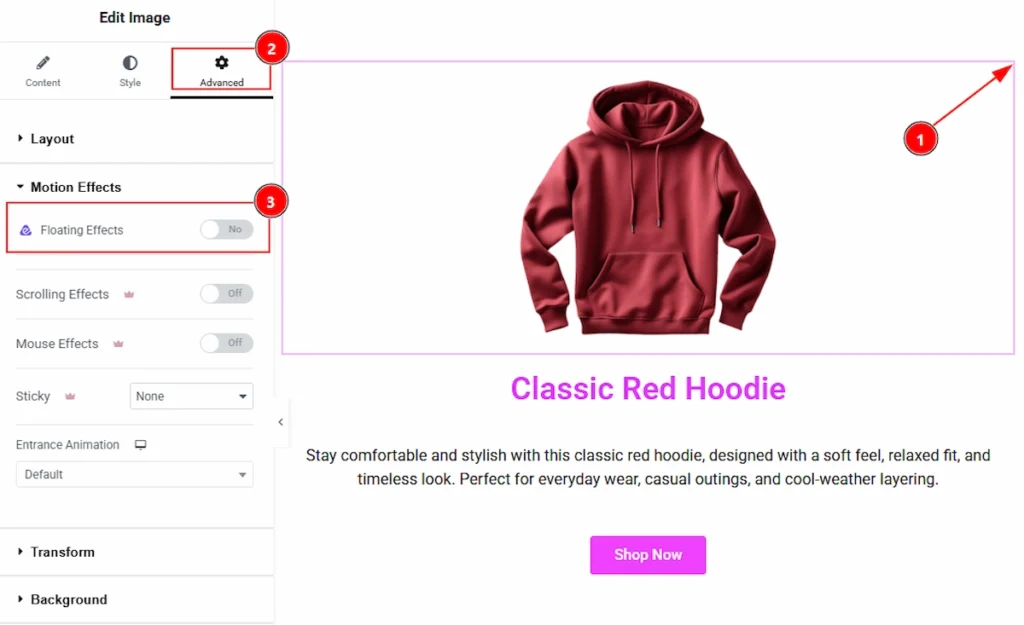
1. To find the Floating Effects Extension, you must need to select the element where you want to use the extension.
2. Now, move to Advanced Tab of the selected widget.
3. Here, you will find the default Motion Effects. Now inside the Motion Effects section, you will find the Floating Effects.
Using the Floating Effects Extension #
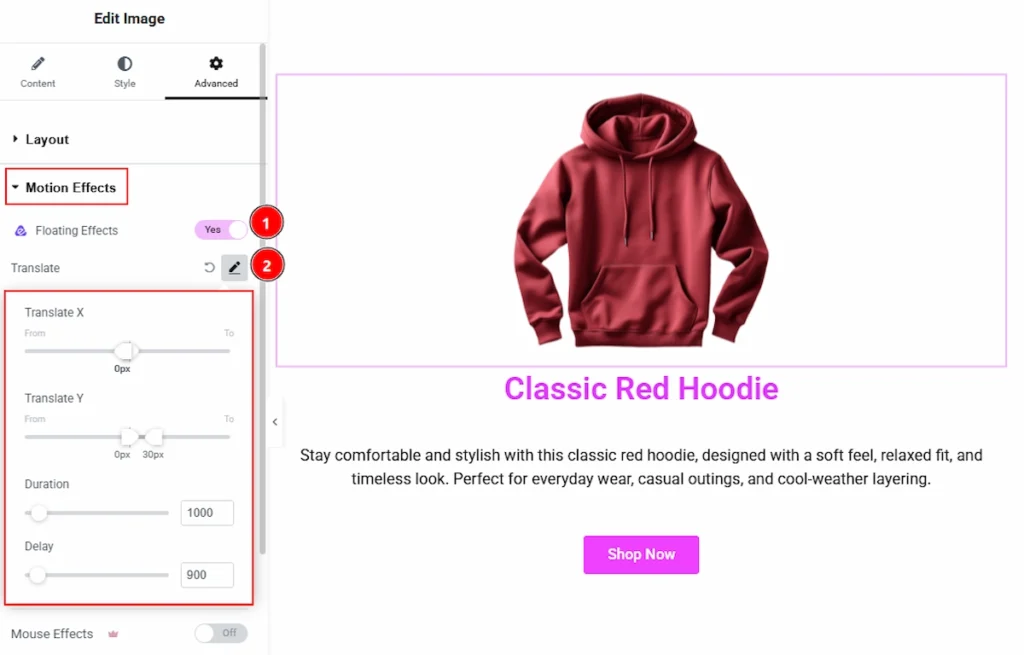
1. Floating Effects: Enable the switcher to get the options to use customize the floating effects.
2. Translate: With this option you can move the element from one position to another along the X and Y axes, creating a smooth floating or shifting animation effect. Let’s see what we can customise with this Translate option –
- Translate X – You can move the element horizontally (left to right) with this option.
- Translate Y – You can move the element vertically (up and down). Note: The From → To values define the starting and ending position of the movement.
- Duration – This option controls how long the animation will take.
- Delay – You can set how long it waits before starting with this option.
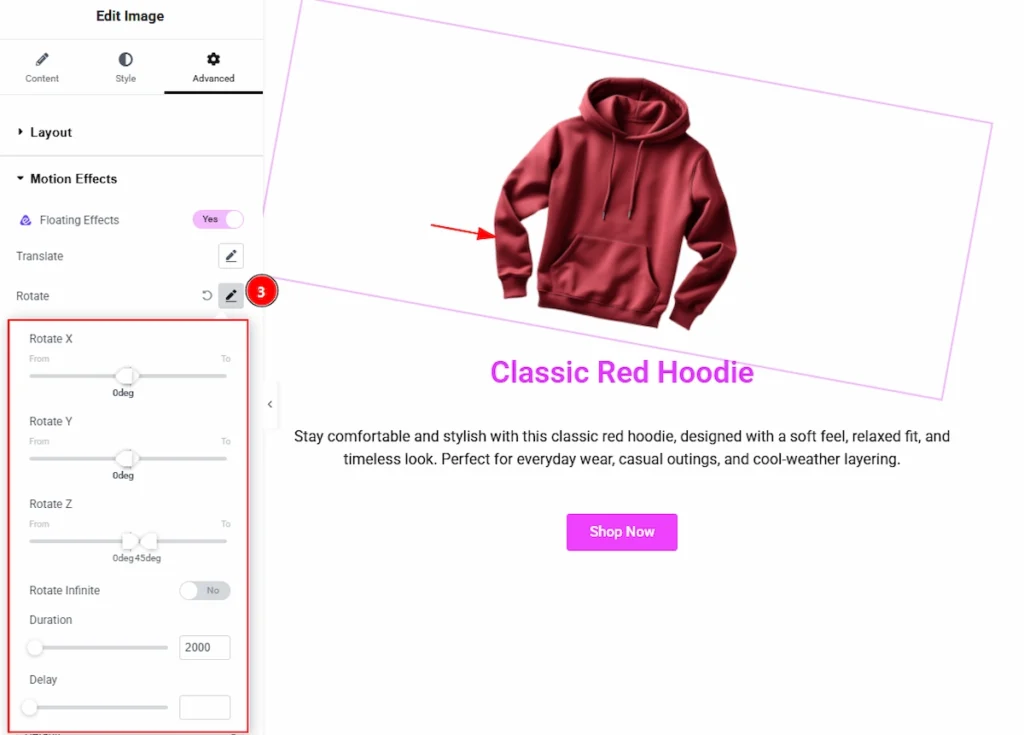
3. Rotate: You can add a rotation animation to the element along different axes, creating a 2D or 3D spinning effect. Let’s see what we can customise with this Rotate option –
- Rotate X – This option allows you to rotate the element along the horizontal axis (tilts it forward or backward in 3D).
- Rotate Y – This option allows you to rotate rotate it along the vertical axis (spins it side‑to‑side in 3D).
- Rotate Z – This option allows you to rotate rotate it normally from the front (standard clockwise or counterclockwise spin).
(Note: From → To sets the starting and ending rotation angles.) - Rotate Infinite – Enable the switcher to make the rotation loop continuously with this option.
- Duration – This option controls how long the rotation will take.
- Delay – You can set how long it waits before starting.
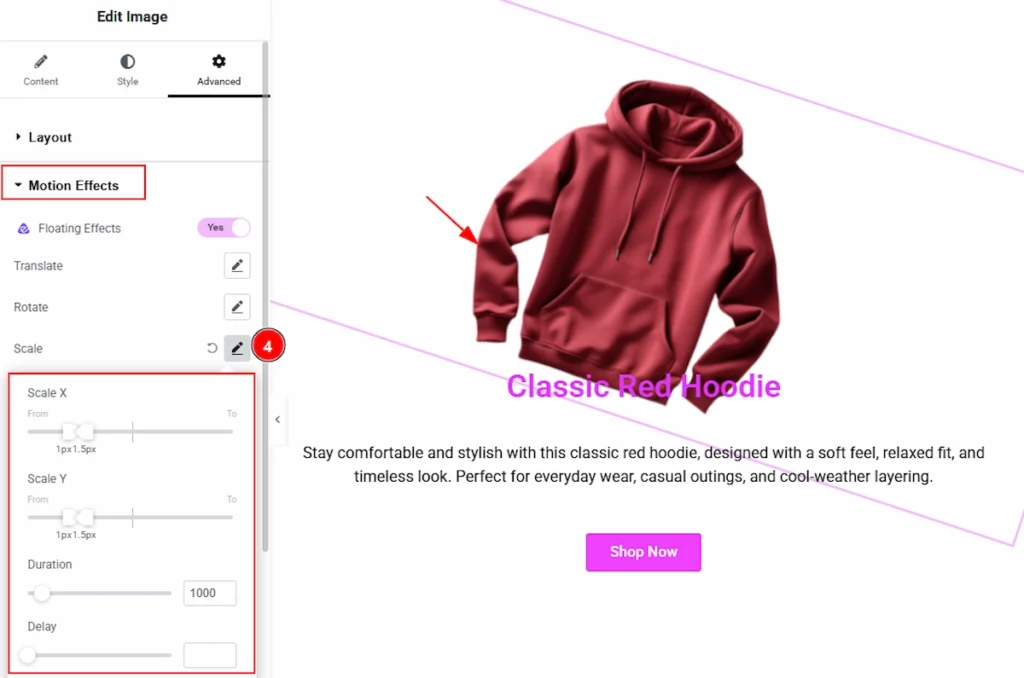
4. Scale: This option allows you to animate the size of the element, making it grow or shrink smoothly.
- Scale X – You can make changes the width (horizontal size) from the “From” value to the “To” value.
- Scale Y – You can make changes the height (vertical size) from the “From” value to the “To” value.
- Duration – This option controls how long the rotation will take.
- Delay – You can set how long it waits before starting.
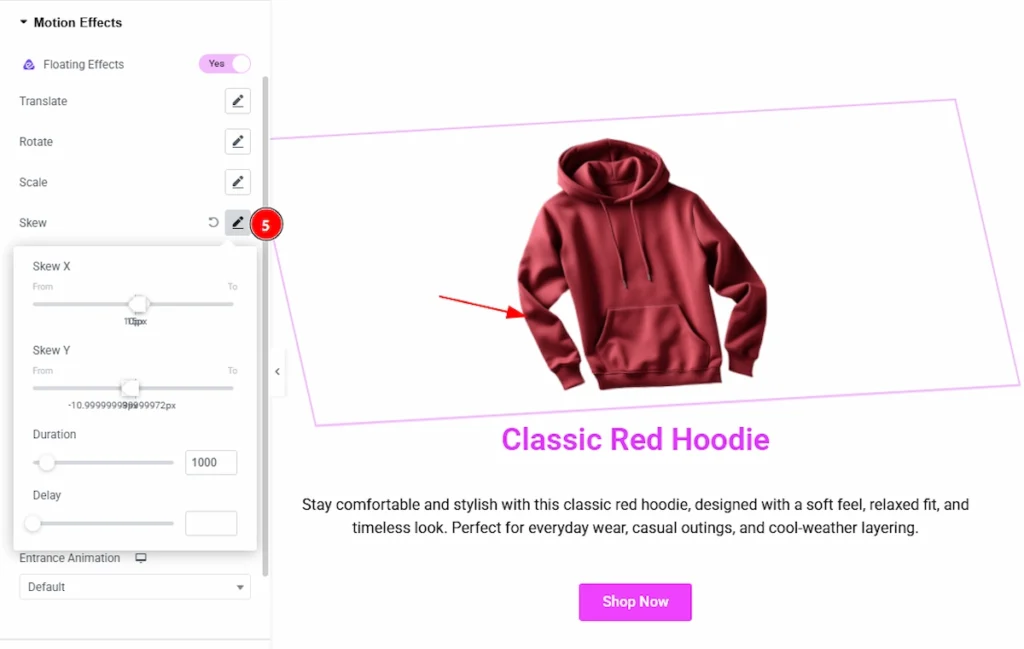
5. Skew: This options allow you to animate the element by slanting or distorting its shape along the X or Y axis.
- Skew X tilts the element horizontally (left or right), shifting the top and bottom edges.
- Skew Y tilts it vertically (up or down), shifting the left and right edges.
- Duration – This option controls how long the rotation will take.
- Delay – You can set how long it waits before starting.
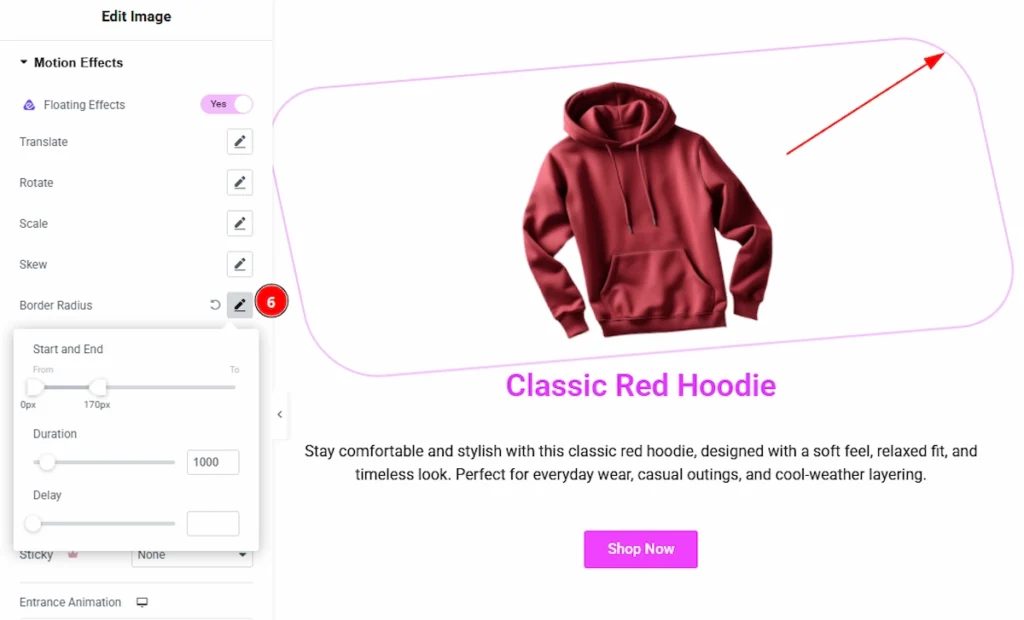
6. Border Radius: You can animate the corner as roundness of the element over time with this option.
- Start and End (From → To) – You can set the initial and final corner radius values, changing the shape from slightly rounded to more circular with this option.
- Duration – You can control how long the shape transition will take with this option.
- Delay – You can set how long it waits before starting the animation.
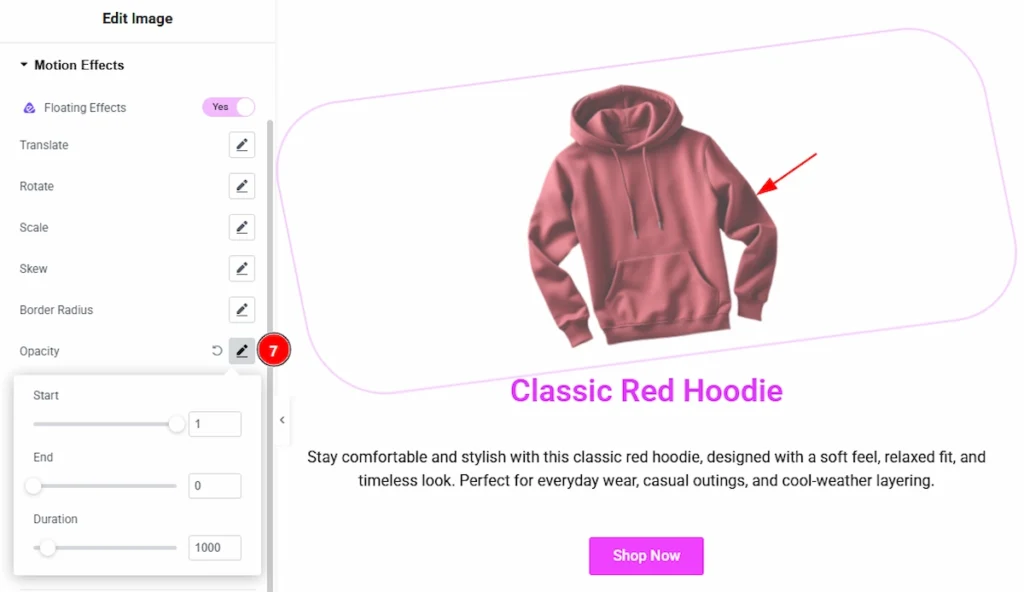
7. Opacity: You can control the transparency animation of the element how it will be visible during the effect with this option. You can make changes to –
- Start – You can set the initial transparency level with this option.
- End – You can set the final transparency level with this option.
- Duration – You can control how long it takes to transition from the start opacity to the end opacity.
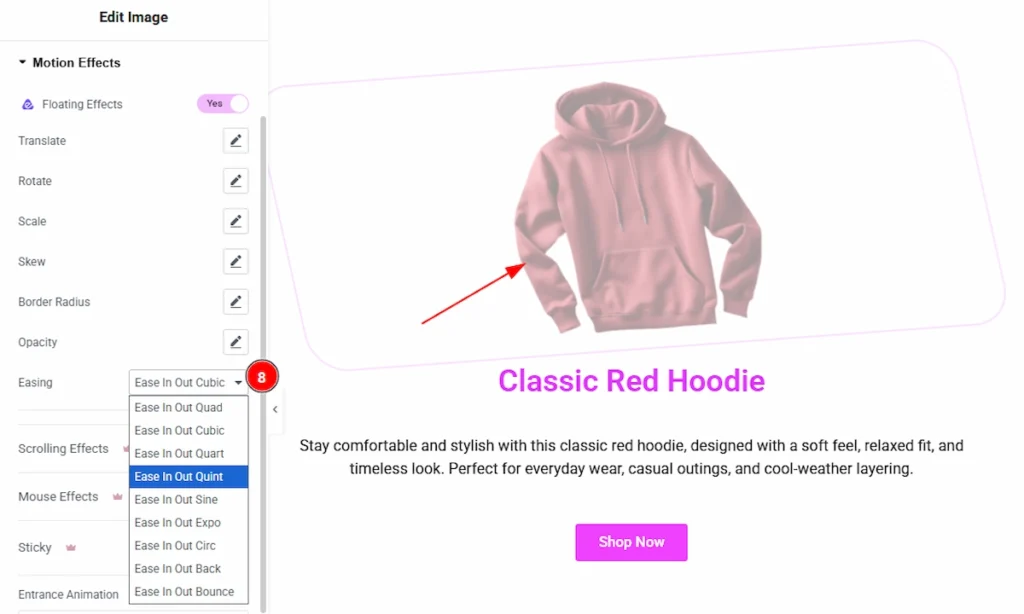
7. Easing: This option control the speed style of the animation — how it starts, moves, and ends instead of moving at a constant speed. You will find some options and you can choose any of those that meet your expectation.
All done, You have successfully customised the Floating Effects Extension on your website.
Video Tutorial #
You can also watch the video tutorial to learn more about theFloating Effects extension.
Thanks for being with us.