
Extension in Wow Elements.
The Particles Extension in Atomic Addons allows you to add animated particle effects to Elementor sections and backgrounds, creating a more dynamic and interactive visual experience. It helps enhance your website design with moving particles, shapes, and other engaging background effects that can respond to visitor interactions. With flexible customization options and multiple particle styles, you can easily create attractive and immersive layouts without writing custom code. This documentation will guide you through how to use and configure the Particles Extension in Atomic Addons.
Enable the Particles Extension #
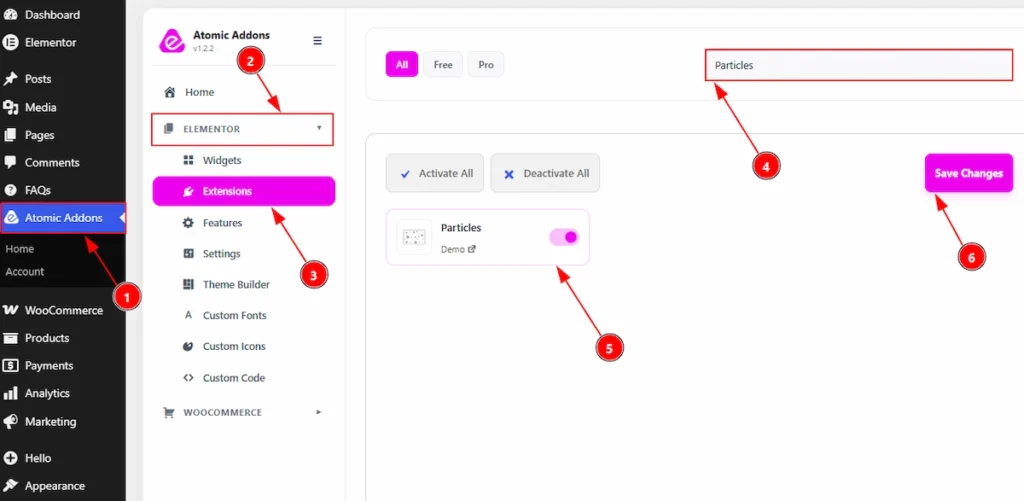
To use the Particles Extension from Atomic Addons, first, you have to enable the extension.
- Go to WordPress dashboard → Atomic Addons Plugin dashboard.
- Then, click on the Elementor Tab and the sub items will open.
- Then, Click the Extensions Tab.
- Search for the Particles Extension.
- Enable the Particles Extension.
- Hit the Save Settings Button.
Place To Find The Particles Extension #
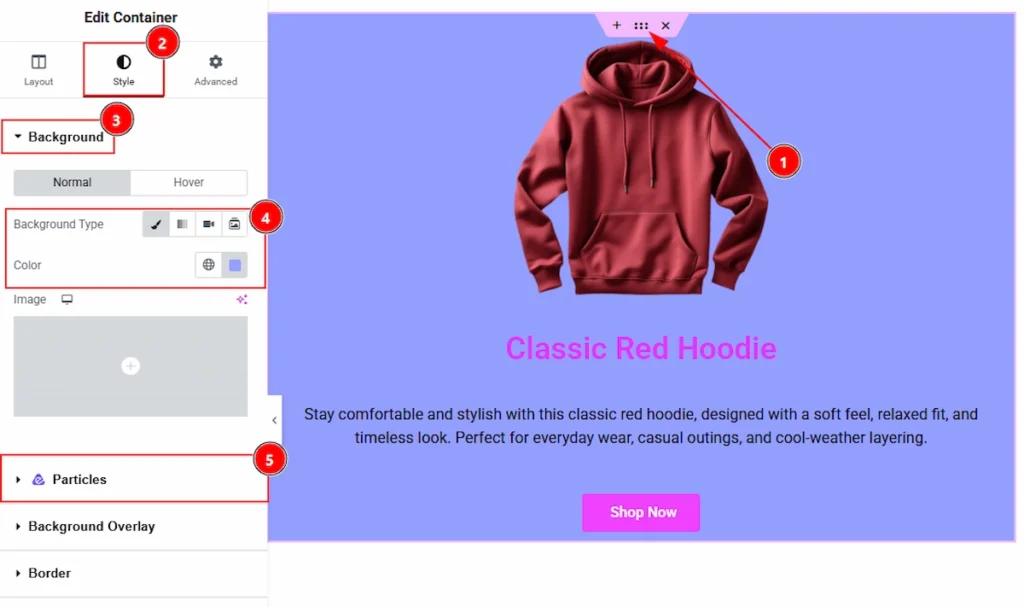
You must need to create a design first, where you want to set the particles. After that follow the below steps –
1. To find the Particles Extension, you must need to select the container / section.
2. After that, move to the Style tab of the container.
3. You will find the Background option. Change the background color of the section/container to get better result.
4. Here you can make changes to the background type and color of the section or container.
5. And, finally here you will get the Particles Extension to customize the background with animated particles effect.
Using the Particles Extension #
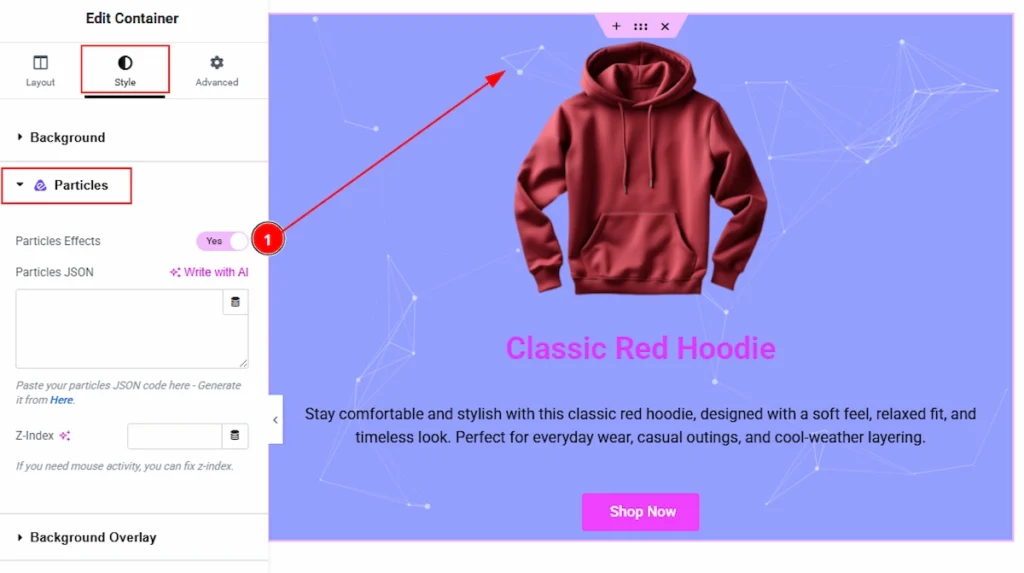
1. Particles Effects: Enable the switcher to add the particles extension to the section / container.
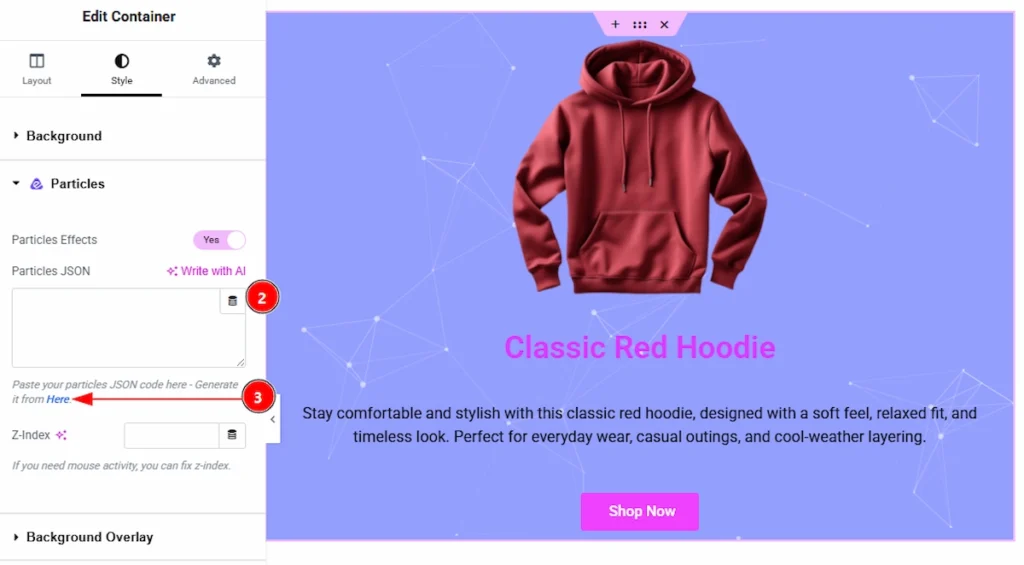
2. Particles JSON: You can paste here the JSON file of the particles design that you want to show & add to your container / section.
3. Particles JSON: If you don’t have any JSON of your own, don’t worry, you can generate the JSON code. Just click on the HERE button and it will take you to a new tab.

In the new tab that will open, here you can see the partices effects and you can create as you like and copy or download the JSON code and use that to your section/container. Let’s see what we have here to customize the particles –
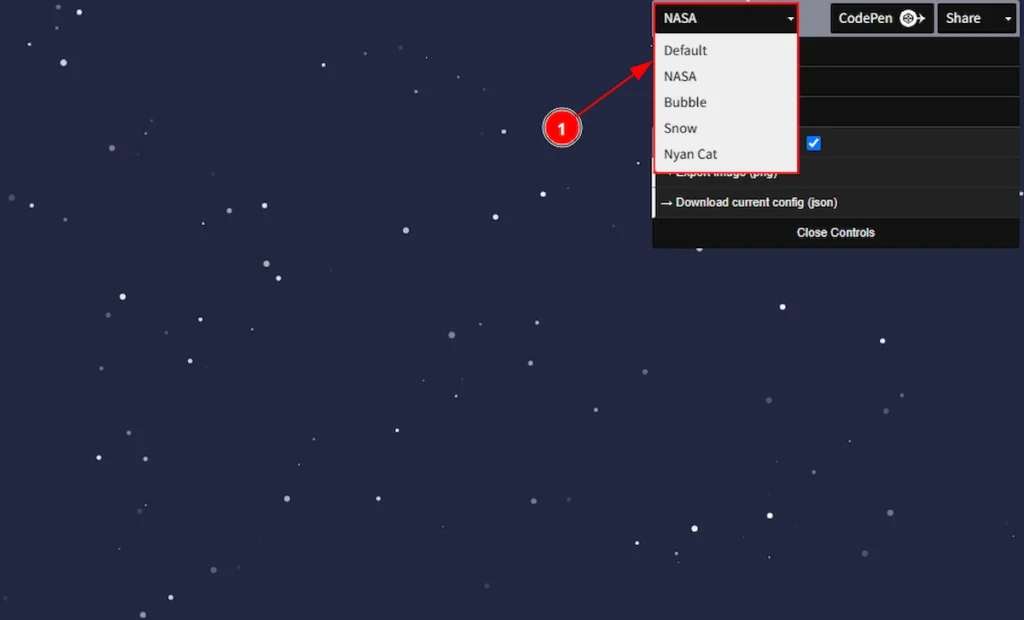
1. Here, you can choose the particles layout as Default, NASA, Bubble, Snow or Nyan Cat. Choose one that you prefer to use to your site.
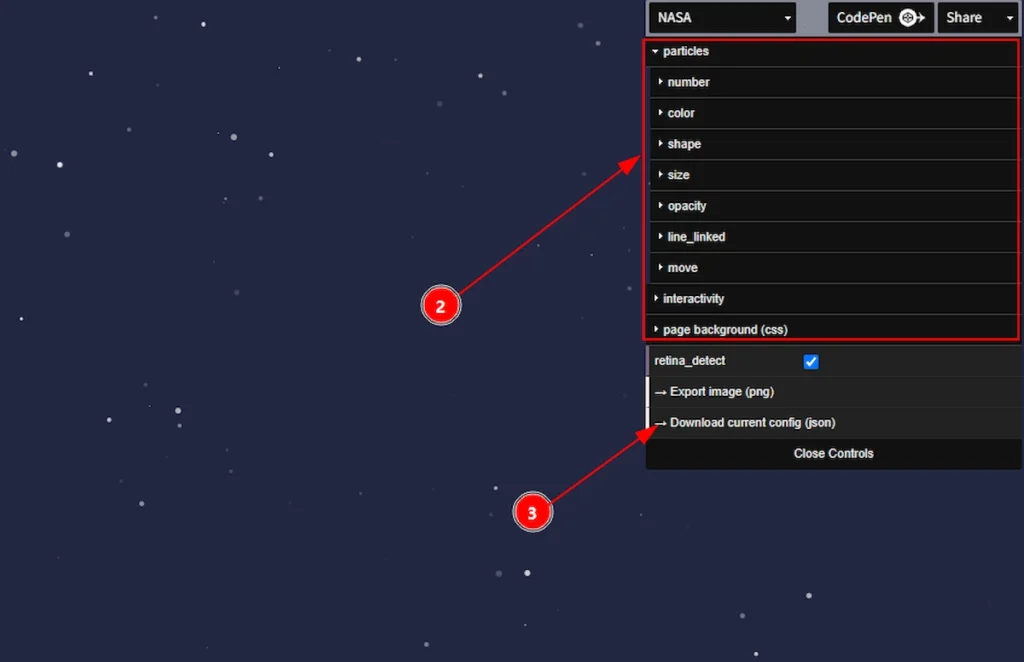

2. You can adjust the particles effect by the particles, number, color, shape, size, opacity, line_linked, move, interactivity & page background (css) here.
3. After creating the particle design you can download the current config by clicking on this option.
All done, you have generated a particle effect. Now let’s see how to apply it to your site and use it to create amazing design.
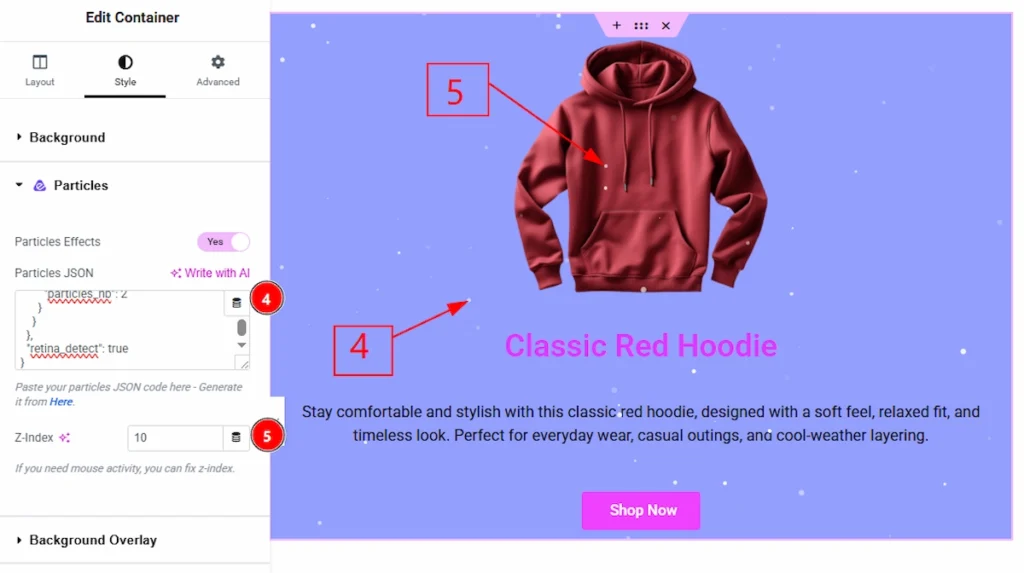
4. Particles JSON: Paste the Current Config JSON here and you will see the same design of the particles that you have created on other site. This will help you not to write code by yourself and just copy paste the things to make work more easier for you.
5. Z-Index: Set a value here if you need mouse activity over the section and particles. After adding the z index the particles will show in front of the content and it, will look more beautiful then. You can set any value here to see the changes.
Final Preview of Particles Extension #
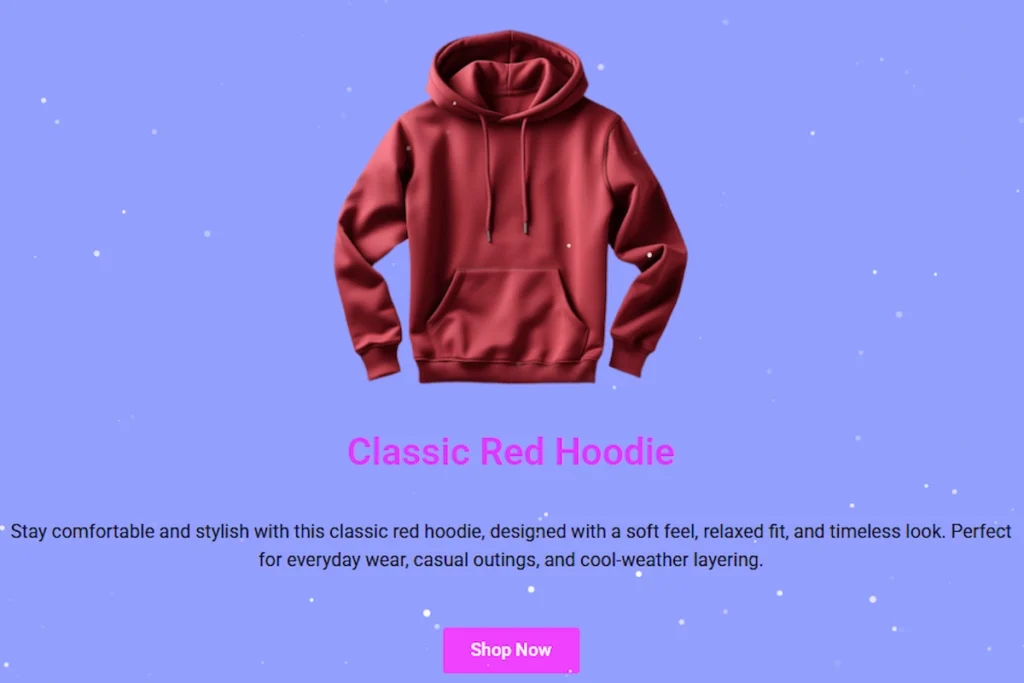
This is the final preview when you have applied the JSON and publish the page.
All done, You have successfully customized the Particles Extension on your website.
Video Tutorial #
You can also watch the video tutorial to learn more about the Particlets extension.
Thanks for being with us.