
The Grid Line extension in Atomic Addons allows you to add elegant grid line overlays to your Elementor sections and containers without writing any code. It helps you create clean, modern, and well-structured layouts by displaying customizable horizontal and vertical grid lines in the background of your content. With easy-to-use customization controls and responsive settings, you can adjust the grid’s appearance to perfectly match your website’s design across all devices. In this documentation, we’ll guide you through how to enable, configure, and customize the Grid Line extension in Atomic Addons.
Enabling the Grid Line Extension #
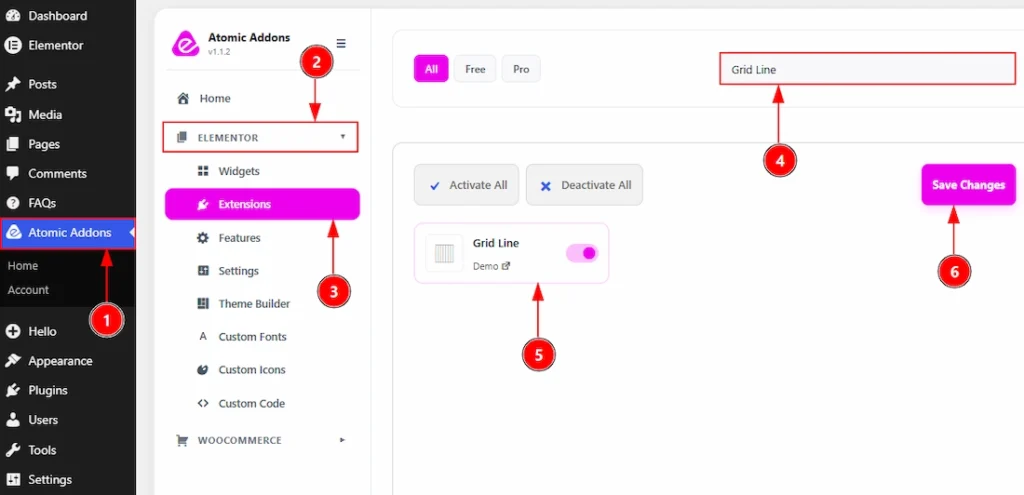
To use the Grid Line Extension from Atomic Addons, first, you have to enable the extension.
- Go to WordPress dashboard → Atomic Addons Plugin dashboard.
- Then, click on the Elementor Tab and the sub items will open.
- Then, Click the Extensions Tab.
- Search for the Grid Line Extension.
- Enable the Grid Line Extension.
- Hit the Save Settings Button.
Place to Find the Grid Line Extension #
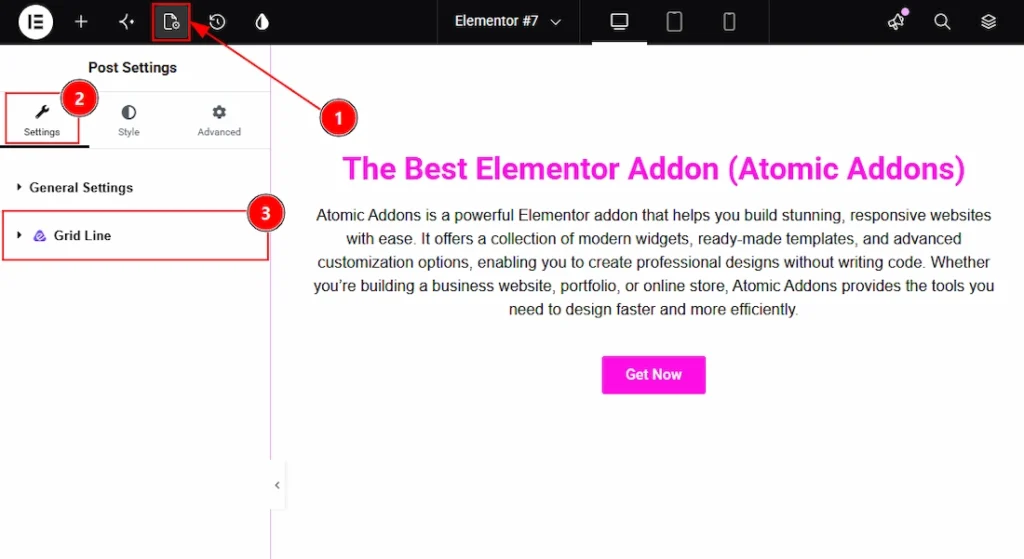
You need to go to the Page first where you want to add the extension. Navigate to WP Dashboard > Pages > Select the Page you want > Edit Page with Elementor. After the page opens, then follow the below steps –
1. Click on the Page Settings icon on Elementor Editor Page.
2. Now click on the settings tab.
3. Here, below the General Settings, you will find the Grid Line Extension tab.
Using the Grid Line Extension #
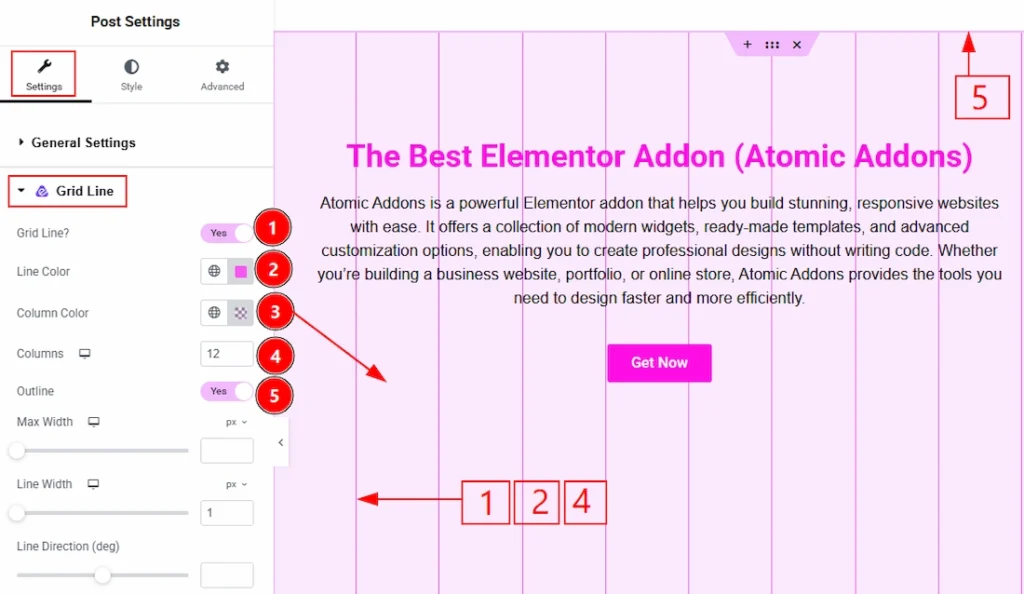
In this part we will have a look to all the options that are available on Grid Line extension. The changes you will made that will apply to the page. Let’s see what we have here and how the options works –
1. Grid Line: Enable the switcher by which you will get more customisation options below.
2. Line Color: After enable the switcher you can see the visual of the grid lines to your page. Now, with this option you can change the line color.
3. Column Color: You can make changes to the column color with this option.
4. Columns: You can add the number of columns that you want to show to your audience with this option.
5. Outline: Enable the switcher to activate the grid line to the outline with this option.
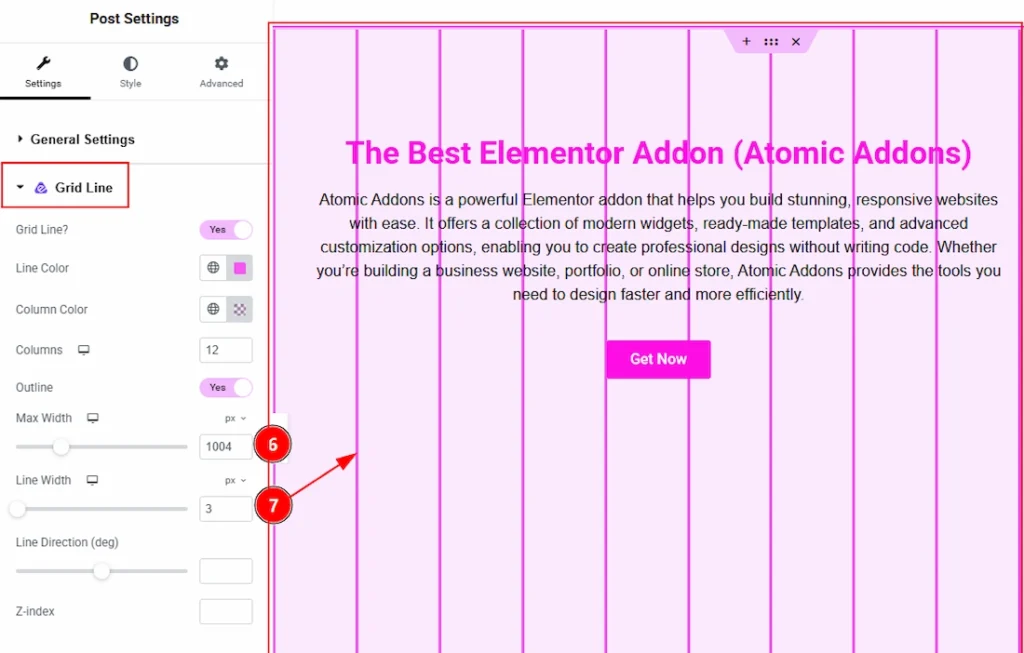
6. Max Width: You can adjust the width of the grid line area with this option.
7. Line Width: You can set the thickness of the line with this option.
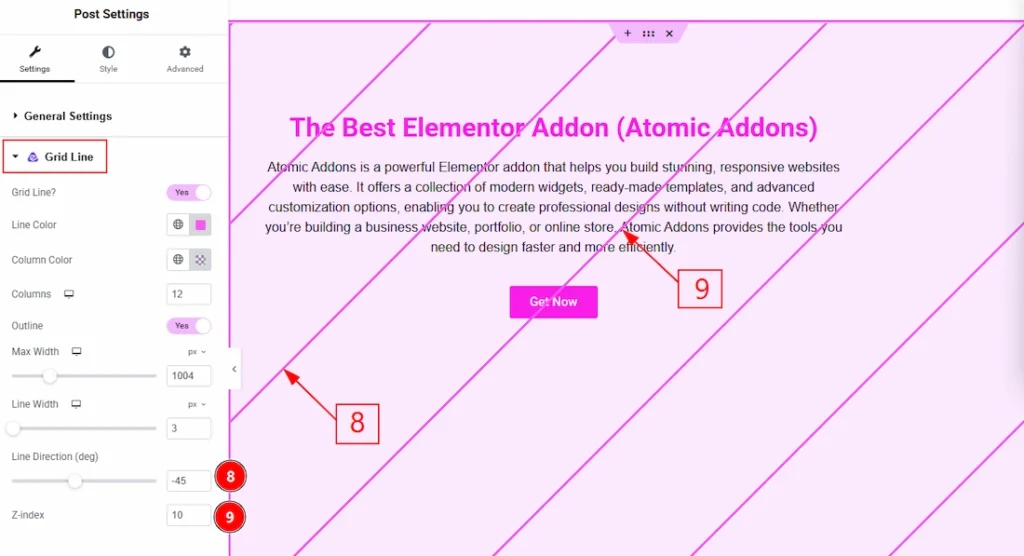
8. Line Direction (deg): This option controls the angle and direction of the grid lines displayed in the background. By adjusting the degree value, you can rotate the grid lines to create different visual styles and layout effects.
9. Z-index: The Z-Index option controls the stacking order of the grid lines relative to other elements on the page. It determines whether the grid lines appear in front of or behind your content.
All done, You have successfully customized the Grid Line Extension on your website element.
Video Tutorial #
You can also watch the video tutorial to learn more about the Grid Line extension.
Thanks for being with us.