
The Notation extension in Atomic Elements allows you to highlight and emphasize important text, headings, and content with eye-catching annotation styles. It helps draw users’ attention to key information by adding creative markers, underlines, circles, highlights, and other visual effects without requiring any custom code. With flexible customization options and seamless Elementor integration, you can enhance content visibility and create more engaging page designs. This documentation will guide you through how to use and customize the Notation extension in Atomic Elements.
Enable the Notation Extension #
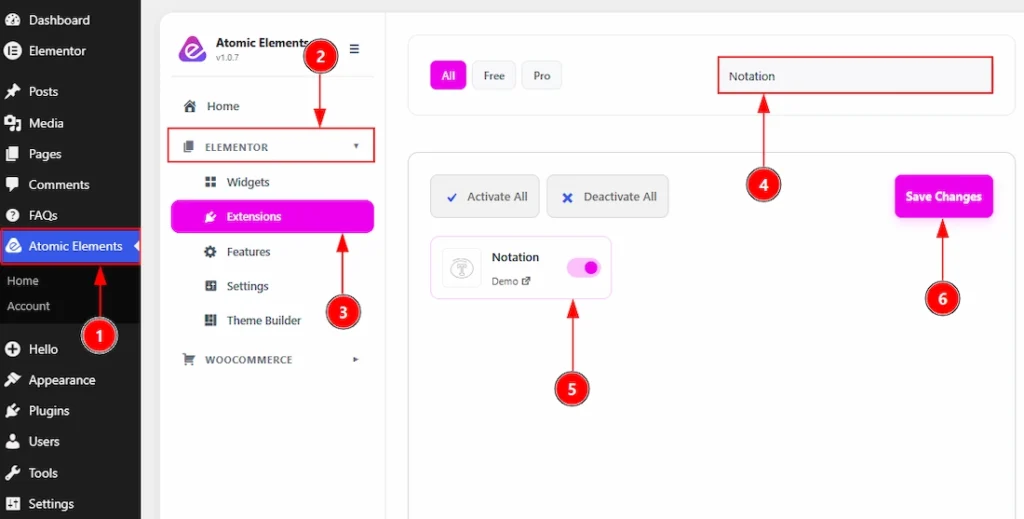
To use the Notation Extension from Atomic Elements, first, you have to enable the extension.
- Go to WordPress dashboard → Atomic Elements Plugin dashboard.
- Then, click on the Elementor Tab and the sub items will open.
- Then, Click the Extensions Tab.
- Search for the Notation Extension.
- Enable the Notation Extension.
- Hit the Save Settings Button.
Place to Find the Notation Extension #
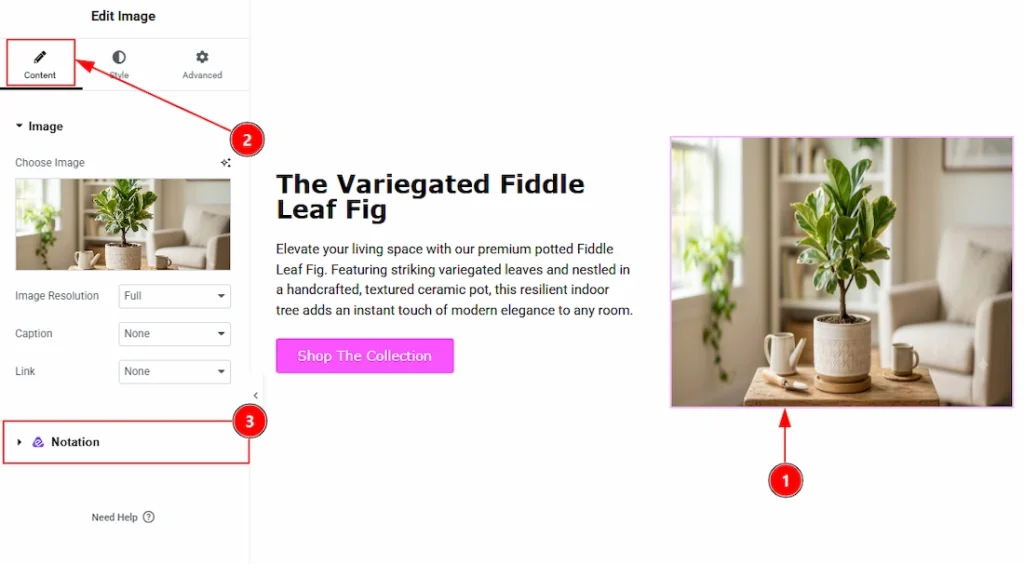
To get the Notation extension, you must need to select any element, that can be widget, section or any container. Follow the below steps –
- Select any widget where you want to use the Notation extension.
- Go to Content Tab of the selected element.
- Below you will see the option named Notation & here you can customize it.
How The Notation Extension Works #
The Notation feature works with the existing content on your page. For this demonstration, we’ll use a sample to show how the feature works for the widgets & custom selection.
Use Notation with widgets #
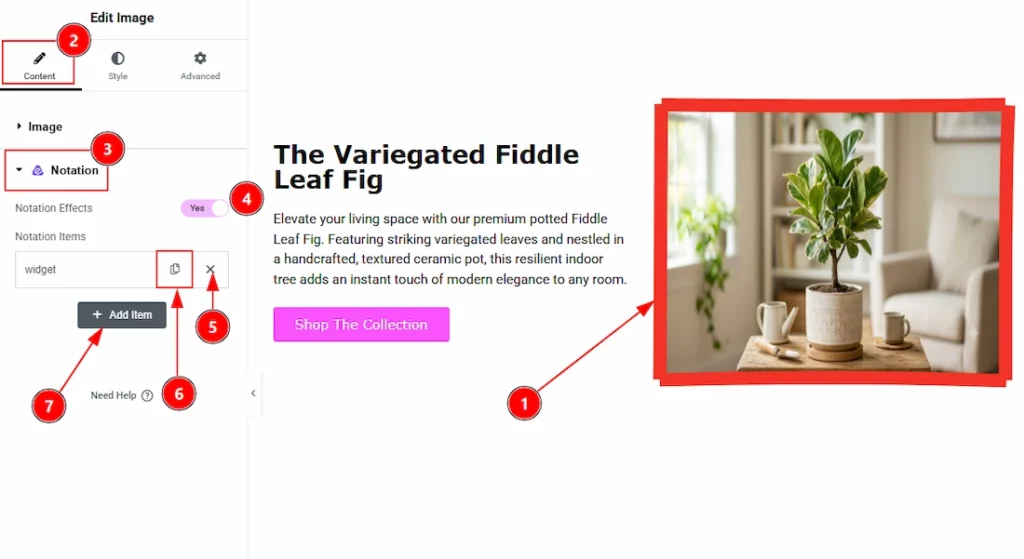
1. Click on the Image widget to select it as we have used this widget to show an example to you.
2. Now, go to Content Tab of the image widget.
3. Now, go to Notation option that placed in the Content Tab.
4. Add enable the switcher of the Notation Effects.
5. You can see the Notation items here. You can click on the close button to close the notation item.
6. You can click on the copy item to copy or duplicate the same notation item.
7. You can click on the Add Item to add more notation item
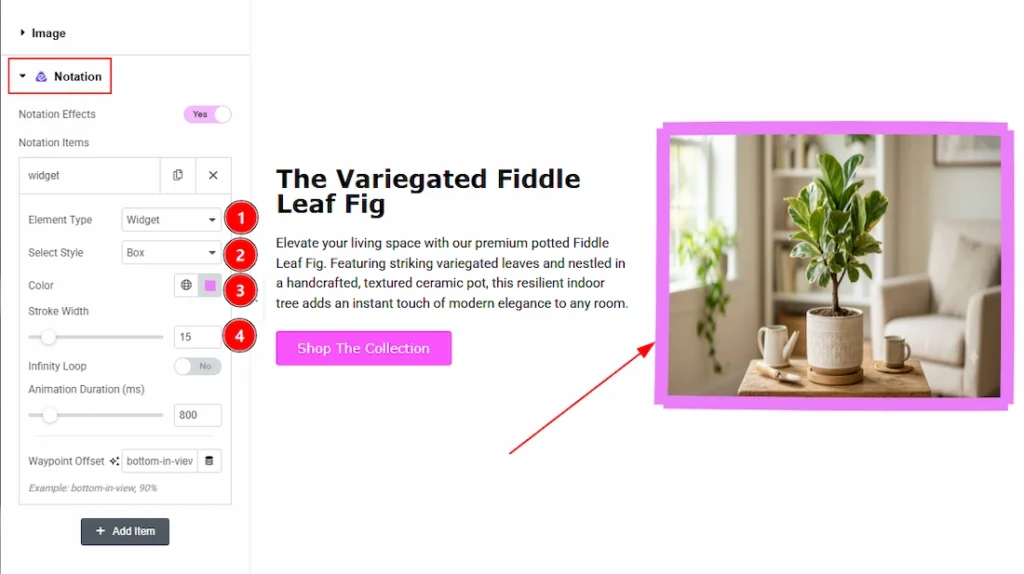
Now, let’s see what we have inside the Notation Item –
1. Element Type: You can select the element type as widget or widget > custom selector with this option.
2. Select Style: You can select the notation style as Underline, Box, Circle, Highlights, Strike-through, Crossed-off, Bracket or Soft wave with this option.
3. Color: You can make changes to the notation color with this option,
4. Stroke Width: You can adjust the thickness of the notation with this option
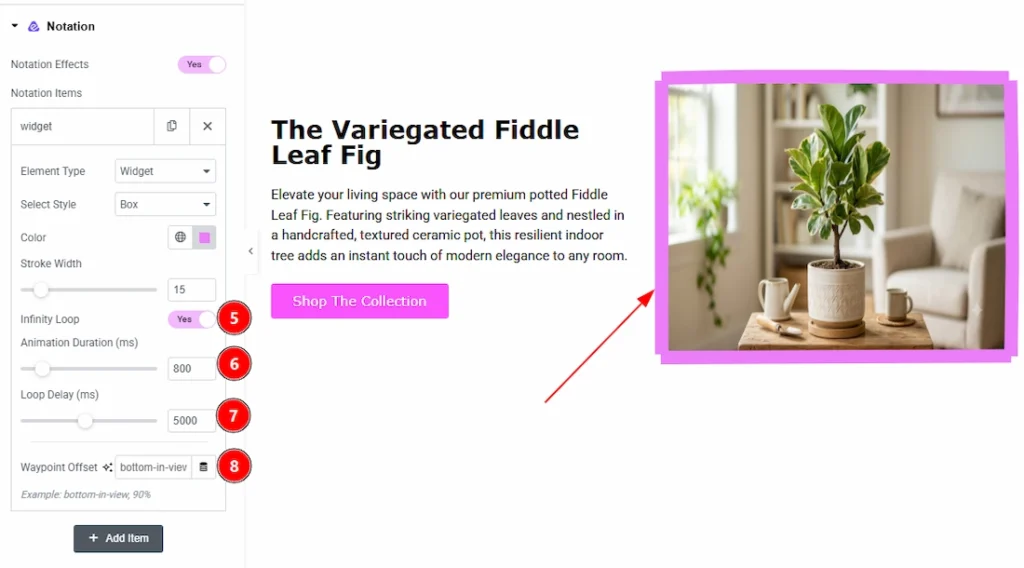
5. Infinity Loop: Enable the switcher to continuously repeating the notation to draw attention to your audience.
6. Animation Duration: You can set up the animation duration in (ms) with this option.
7. Loop Delay: You can set up the delay timing of repeating the notation with this option.
8. Waypoint Offset: This option controls when the notation animation starts as the user scrolls and the element becomes visible on the screen.
Use Notation with Custom Selector #
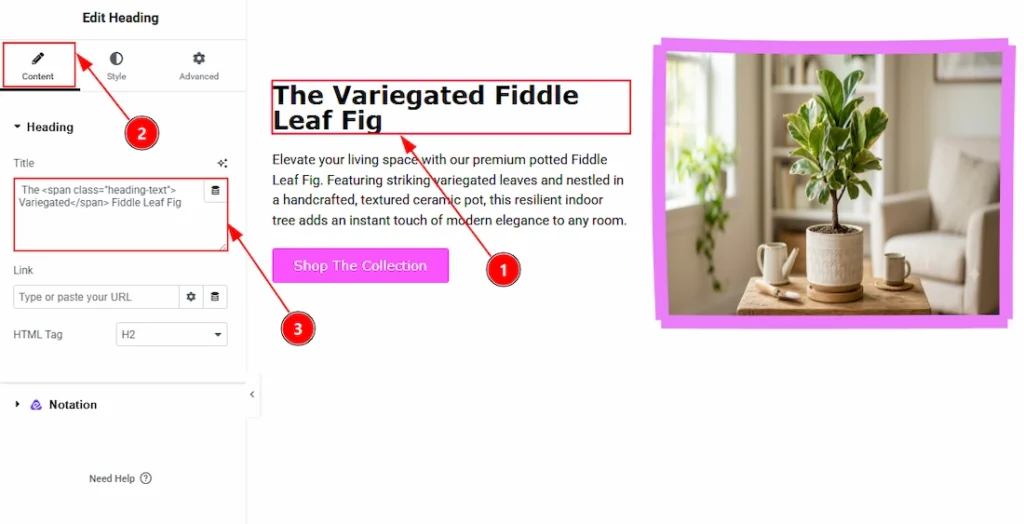
- Select the widget where you want to use the notation.
- Go to Content Tab of the widget.
- As we have selected the Heading widget so if we want we can apply the Variegated on single word of the headings as well. For this we need to add the class to the single word to make it noticed. Here, we have selected the Variegated word to be notationed and so we have add this on the text – Variegated
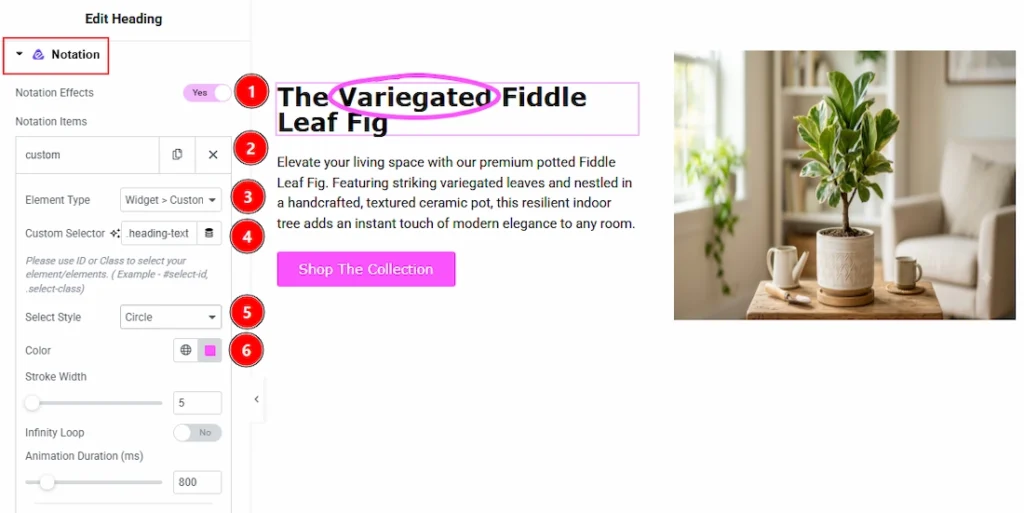
1. Now, let’s move to the Notation Tab and enable the switcher.
2. Open the Notation item.
3. Element Type: Select the element type as Widget > Custom Selector as we want to show a custom word notationed.
4. Custom Selector: Enter the ID or Class to select the elements. As on the heading we have used the span class as heading-text so add this here. Please take a note that you need to add a |.| before the class.
5. Select Style: You can select the notation style as Underline, Box, Circle, Highlights, Strike-through, Crossed-off, Bracket or Soft wave with this option.
6. Color: You can make changes to the notation color with this option.
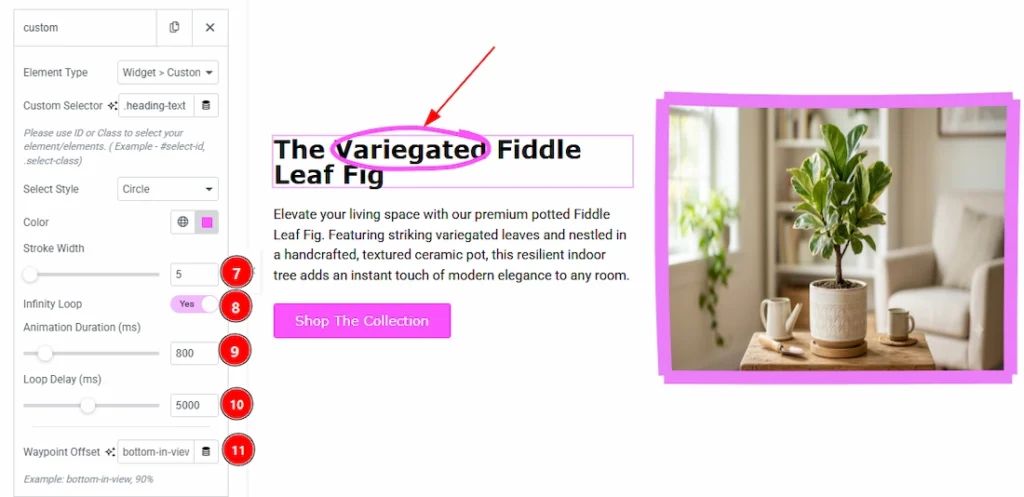
7. Stroke Width: You can adjust the thickness of the notation with this option.
8. Infinity Loop: Enable the switcher to continuously repeat the notation to draw attention to your audience.
9. Animation Duration: You can set up the animation duration in (ms) with this option.
10. Loop Delay: You can set up the delay timing of repeating the notation with this option.
11. Waypoint Offset: This option controls when the notation animation starts as the user scrolls and the element becomes visible on the screen.
All done, you have successfully used the Notation feature on your website.
Video Tutorial #
You can also watch the video tutorial to learn more about the Notation extension.
Thanks for being with us.